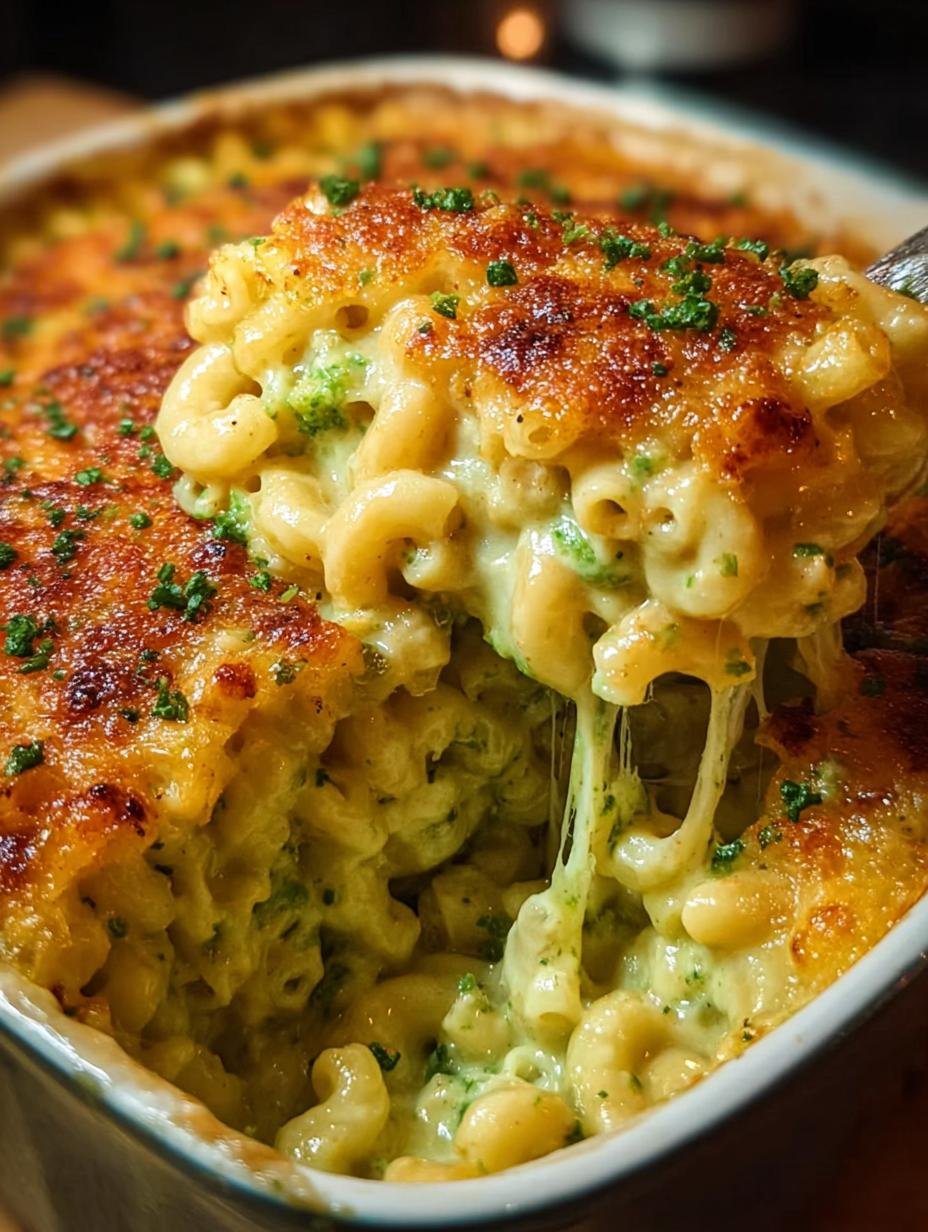
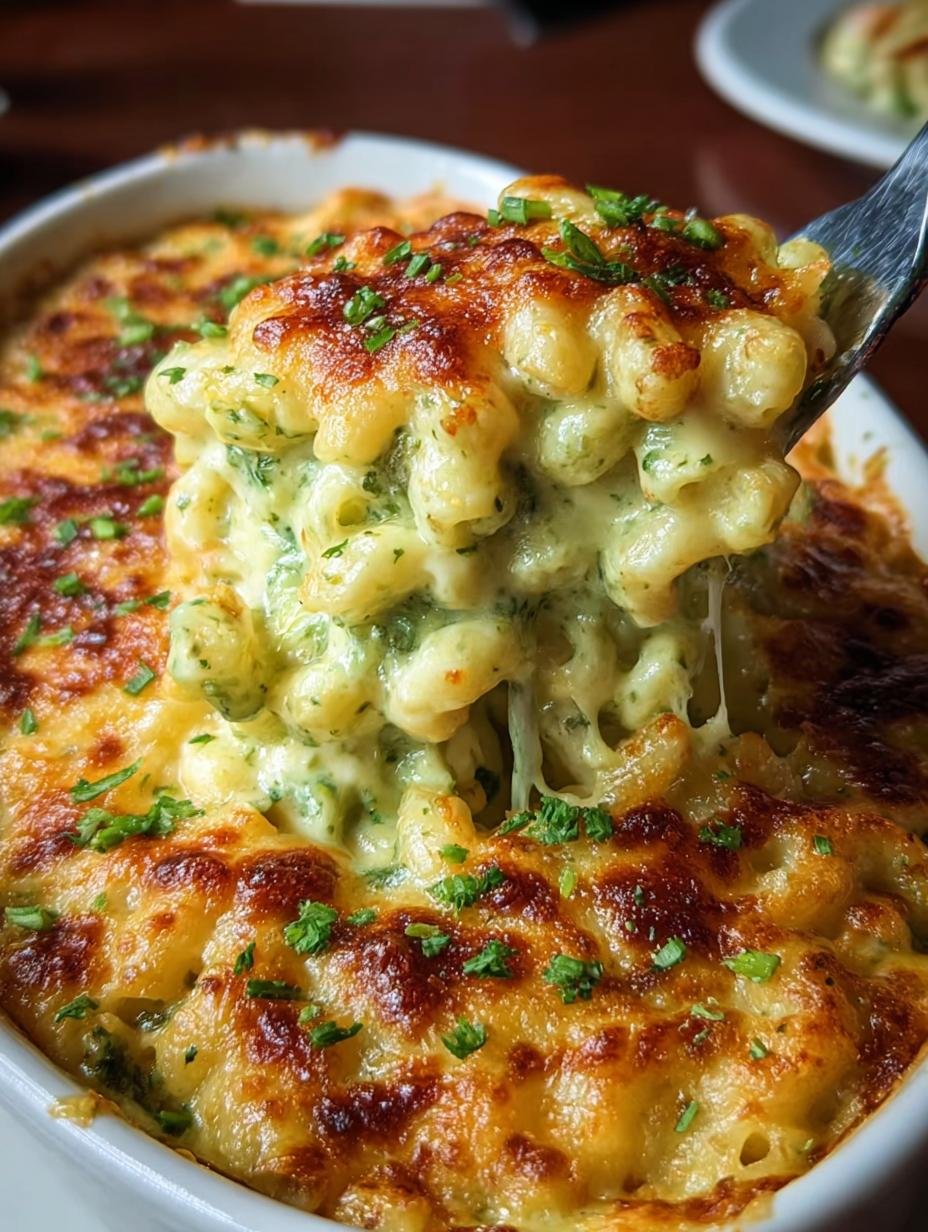
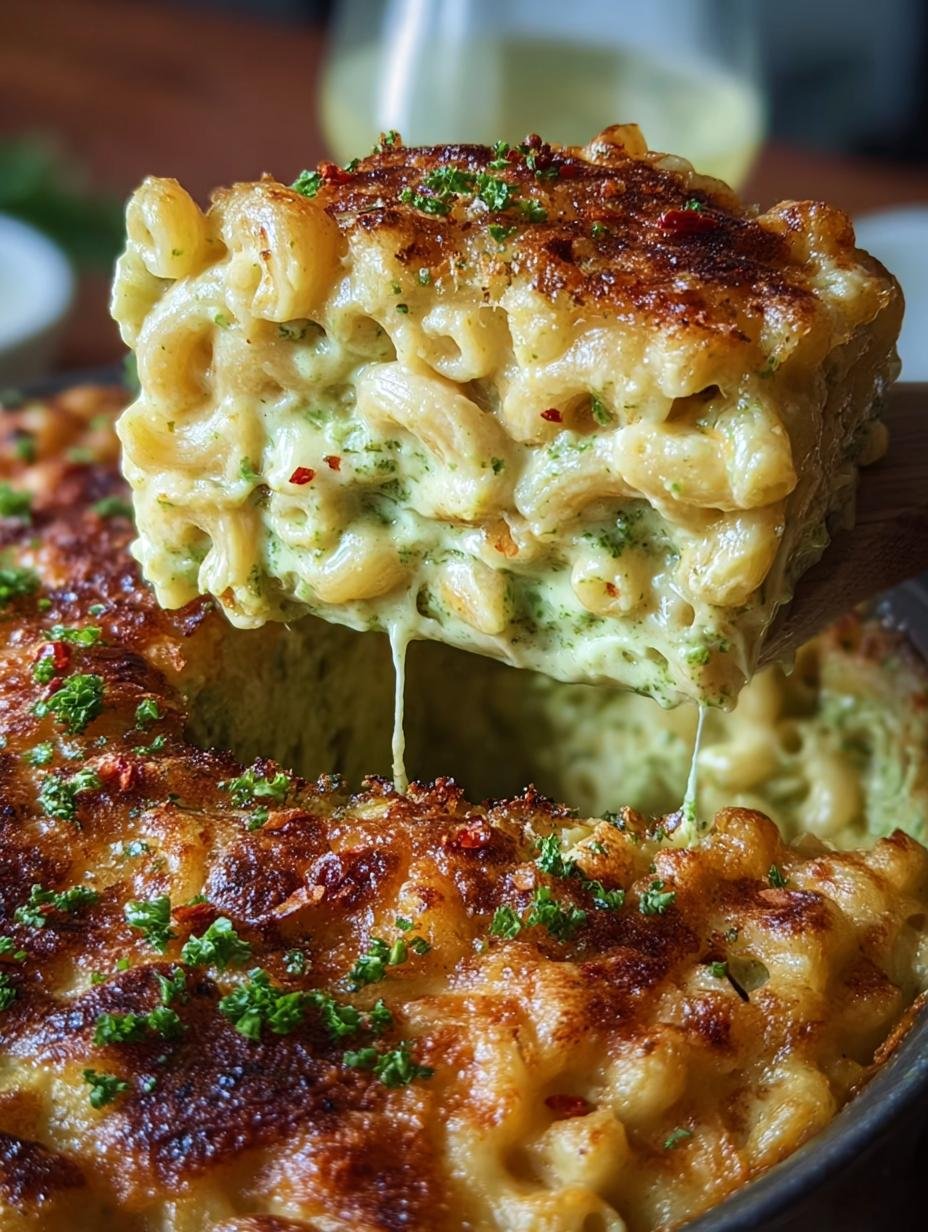
Monster Mac Cheese has been my ultimate weeknight savior and party showstopper ever since I discovered its magical potential. I remember the first time I made it for a potluck; the anticipation in the room as the golden crust bubbled was electric. The smell alone, a rich, cheesy aroma that promises pure bliss, had everyone gathered around the oven. This isn’t just any mac and cheese; it’s a decadent, layered masterpiece with a smoky crunch that shatters with every bite. It’s the ultimate comfort food that feels incredibly special yet is surprisingly easy to make, a truly easy baked mac and cheese that never disappoints. Let’s get cooking!
Why You’ll Love This Monster Mac Cheese
- An unbelievably rich and cheesy flavor that will have everyone asking for seconds.
- Remarkably quick prep time – you can have this on the table in under an hour!
- It’s a surprisingly budget-friendly meal that feels incredibly decadent.
- This is the ultimate family dinner winner, guaranteed to please even the pickiest eaters.
- Experience the joy of a perfectly creamy mac and cheese with every single bite.
- Packed with flavor, it’s a substantial main dish that satisfies deeply.
- The smoky crunch and gooey layers make it a truly memorable meal.
- An easy and impressive dish for gatherings or a special weeknight treat.
Ingredients for Monster Mac Cheese
Gathering these simple mac and cheese ingredients is the first step to creating this legendary dish. I’ve found that using high-quality components really makes a difference in the final flavor and texture, so don’t skimp here!
- 1 lb elbow macaroni – the classic shape that holds all that glorious cheese sauce
- 4 tbsp unsalted butter – forms the base of our roux
- 1/4 cup all-purpose flour – thickens the sauce beautifully
- 3 cups whole milk, warmed – adds creaminess without being too heavy
- 1 cup heavy cream, warmed – for that extra rich, decadent mouthfeel
- 12 oz extra-sharp cheddar, freshly grated, divided – the star for that sharp, tangy flavor
- 6 oz Colby Jack, freshly grated – melts like a dream and adds a mild, creamy counterpoint
- Optional: 4 oz Gruyère, grated – for a nutty depth and sophisticated flavor
- 1/2 cup sour cream – contributes a lovely tang and extra creaminess
- 1 tsp kosher salt, plus pasta water – essential for seasoning and bringing out cheese flavors
- 1 tsp dry mustard – a secret weapon that intensifies the cheese flavor
- 1/2 tsp black pepper – for a subtle kick
- Pinch nutmeg – adds a subtle warmth that complements dairy
- 1 tsp Worcestershire sauce – for a touch of umami
- Pinch cayenne, to taste – just a whisper of heat
How to Make Monster Mac Cheese
Follow these simple baked mac and cheese instructions and you’ll be well on your way to mac and cheese perfection. I love how straightforward these steps are, even with all the delicious layers!
- Step 1: Crank your oven up to 400°F (200°C) and get a 9×13-inch baking dish buttered up. This high heat is key for that amazing crust.
- Step 2: Boil your elbow macaroni in generously salted water for about 1 minute less than the package directs for al dente. You want it to have a slight bite since it will finish cooking in the oven. Drain it really well.
- Step 3: Gently warm your milk and heavy cream in a saucepan until they’re steamy but not boiling. This helps create a super smooth sauce.
- Step 4: In a large, heavy-bottomed pot, melt the 4 tbsp unsalted butter over medium heat. Whisk in the 1/4 cup all-purpose flour and cook, whisking constantly, for 2–3 minutes to create a pale, blond roux. It should smell slightly nutty.
- Step 5: Slowly stream in the warm dairy mixture while whisking continuously. Keep whisking until the sauce thickens enough to coat the back of a spoon, which usually takes about 4–6 minutes.
- Step 6: Remove the pot from the heat. Now, stir in half of the extra-sharp cheddar and all of the Colby Jack (and Gruyère, if you’re using it). Whisk until everything is melted and glossy. Fold in the sour cream, kosher salt, dry mustard, black pepper, nutmeg, Worcestershire sauce, and cayenne pepper. Taste it now – this is your chance to adjust seasonings for the perfect flavor!
- Step 7: Gently fold the drained pasta into the cheese sauce until every piece is coated. Pour this glorious mixture into your prepared baking dish, spreading it out evenly. Top it all off with the remaining extra-sharp cheddar.

- Step 8: For the “Loaded Beast” version, scatter the crisped bacon, fried shallots, and roasted garlic chips over the cheese topping. Save the green onions for a fresh garnish later.
- Step 9: Bake for 25–30 minutes, or until the sauce is bubbling around the edges and the top is golden brown. For an even deeper, crispier crust, you can broil it for 1–2 minutes at the very end, watching it closely to prevent burning. These baked mac and cheese instructions really deliver!
- Step 10: Let the Monster Mac Cheese rest for at least 10 minutes before serving. This crucial step allows the sauce to set, ensuring those gooey layers stay put. Garnish with green onions or cilantro, and serve hot for the ultimate comfort food experience.
Pro Tips for the Best Monster Mac Cheese
I’ve learned a few tricks over the years to make my Monster Mac Cheese truly unforgettable. Following these simple tips will elevate your mac and cheese from good to absolutely legendary!
- Always grate your own cheese! Pre-shredded cheese has anti-caking agents that can make your sauce grainy. Freshly grated cheese melts into a silky smooth sauce every time.
- Don’t skip warming the milk and cream. Adding cold dairy to a hot roux can cause it to seize up, resulting in a lumpy sauce. Warming them gently creates a stable, luscious base.
- Taste and adjust your seasonings before adding the pasta. This is crucial for ensuring every bite is perfectly balanced and flavorful.
What’s the secret to perfect Monster Mac Cheese?
The secret lies in the quality of your cheese and the technique of building a smooth, stable sauce. Using a blend of cheeses and warming your dairy are key to achieving those perfect, luscious, gooey layers that define this dish.
Can I make Monster Mac Cheese ahead of time?
Absolutely! You can assemble the entire dish up to 24 hours in advance. Just cover it tightly with plastic wrap and refrigerate. When you’re ready to bake, remove the plastic wrap and bake from cold, adding about 10-15 minutes to the cooking time.
How do I avoid common mistakes with Monster Mac Cheese?
The most common pitfall is using pre-shredded cheese, which leads to a grainy sauce. Another mistake is overcooking the pasta initially; remember it finishes cooking in the oven. Finally, don’t forget to let it rest!
Best Ways to Serve Monster Mac Cheese
This rich and decadent Monster Mac Cheese is a meal in itself, but it also pairs wonderfully with a variety of sides that complement its cheesy goodness. For classic comfort food pairings, I love serving it alongside a crisp green salad with a light vinaigrette to cut through the richness. A simple side of steamed broccoli or roasted asparagus also adds a nice touch of freshness and color to the plate.
If you’re feeling extra indulgent, consider a side of smoky baked beans or some perfectly grilled chicken or sausages. These additions make it a complete feast, perfect for a hearty weekend dinner or a special gathering. No matter how you serve it, this mac and cheese is sure to be a hit!
Monster Mac Cheese Variations
This Monster Mac Cheese is a fantastic base, but I love how versatile it is! You can customize it endlessly to suit your taste or what you have on hand. Here are a few of my favorite ways to mix things up and create truly unique dishes.
- Loaded Mac and Cheese: Amp up the richness by adding crispy bacon, fried shallots, and roasted garlic chips to the top before baking. The combination of smoky, savory, and a hint of sweet makes this version absolutely irresistible.
- Buffalo Mac and Cheese: For a spicy kick, stir in 1 1/2 cups of cooked spicy buffalo chicken and 1/3 cup of blue cheese crumbles into the cheese sauce before baking. Top with extra scallions for a vibrant finish.
- Street Corn Mac and Cheese: Capture vibrant summer flavors by adding 1 cup of charred corn, 1/2 cup of roasted peppers, and 1/3 cup of queso fresco to the mix. Garnish with fresh cilantro for a zesty twist.
- Green Goddess Mac and Cheese: Blend 4 cups of spinach and 1/2 to 1 cup of basil with 3/4 cup of milk to create a vibrant green sauce. Stir this into the cheese sauce for a fresh, herbaceous flavor and a beautiful color.

Nutrition Facts for Monster Mac Cheese
This rich and decadent Monster Mac Cheese is a satisfying dish, and here’s a breakdown of what you can expect per serving (which is about 1 cup). It’s important to remember that these figures are estimates and can vary based on the exact ingredients and portion sizes you use.
- Calories: 560
- Fat: 30g
- Saturated Fat: 18g
- Protein: 24g
- Carbohydrates: 48g
- Fiber: 2g
- Sugar: 5g
- Sodium: 680mg
Nutritional values are estimates and may vary based on specific ingredients used.
How to Store and Reheat Monster Mac Cheese
Even the most delicious Monster Mac Cheese sometimes ends up with leftovers, and I’ve got you covered on how to store and reheat it so it’s just as amazing the next day. Proper storage is key to maintaining that creamy texture and incredible flavor, making your mac and cheese leftovers a joy to eat!
First, always let your mac and cheese cool down for about an hour at room temperature before packing it away. This prevents condensation, which can make it soggy. Transfer the cooled mac and cheese into airtight containers. It will stay fresh in the refrigerator for 3–4 days. For longer storage, you can freeze it! Wrap individual portions tightly in plastic wrap, then place them in a freezer-safe bag or container. It should keep well in the freezer for up to 3 months.
When you’re ready to reheat, the best method for reviving your Monster Mac Cheese is in the oven. Cover the container with foil and reheat at 325°F (160°C). If reheating from the fridge, it will take about 20-30 minutes. If reheating from frozen, allow about 45-60 minutes, or until heated through. Stirring it once midway through reheating helps ensure it warms evenly and stays wonderfully creamy.
Frequently Asked Questions About Monster Mac Cheese
Can I make Monster Mac Cheese spicier?
Absolutely! If you love a good kick, you can easily amp up the heat in your cheesy mac and cheese. Add a few extra pinches of cayenne pepper to the cheese sauce, or stir in some diced jalapeños or a swirl of your favorite hot sauce. For a smoky heat, consider adding some chipotle powder or adobo sauce.
What kind of pasta is best for Monster Mac Cheese?
While elbow macaroni is the classic choice and works wonderfully for holding sauce, feel free to experiment! Any short pasta shape with nooks and crannies will work perfectly for this cheesy mac and cheese. Think shells, cavatappi, rotini, or even penne. The goal is to have surfaces that can capture all that delicious cheese sauce.
How do I get that perfect crispy topping?
Achieving that signature crispy, golden crown is easier than you think! Ensure you’re using enough cheese on top, and don’t be afraid to broil it for the last minute or two under a watchful eye. For an extra crunch, consider adding a layer of seasoned breadcrumbs mixed with melted butter over the cheese before baking. This adds another dimension to your already amazing Monster Mac Cheese.
Is Monster Mac Cheese suitable for vegetarians?
Yes, the base recipe for Monster Mac Cheese is naturally vegetarian! It’s packed with rich cheese and creamy goodness, making it a satisfying meat-free meal. If you’re adding any optional toppings like bacon, just be sure to omit those or swap them for vegetarian alternatives to keep it fully vegetarian.
Print
Monster Mac Cheese: Easy Baked Perfection, 1 Hour
- Total Time: 50 mins
- Yield: 10 servings 1x
- Diet: Vegetarian
Description
Monster Mac and Cheese is a rich, oven-baked mac and cheese with gooey layers, a smoky crunch, and a golden crown that shatters with every bite. It’s a weeknight winner and a party showstopper.
Ingredients
- 1 lb elbow macaroni
- 4 tbsp unsalted butter
- 1/4 cup all-purpose flour
- 3 cups whole milk, warmed
- 1 cup heavy cream, warmed
- 12 oz extra-sharp cheddar, freshly grated, divided
- 6 oz Colby Jack, freshly grated
- Optional: 4 oz Gruyère, grated
- 1/2 cup sour cream
- 1 tsp kosher salt, plus pasta water
- 1 tsp dry mustard
- 1/2 tsp black pepper
- Pinch nutmeg
- 1 tsp Worcestershire sauce
- Pinch cayenne, to taste
- Optional “Loaded Beast”: 6 slices bacon, crisped and chopped; 1/2 cup fried shallots; 1/4 cup roasted garlic chips; 1/2 cup sliced green onions
- Optional “Buffalo”: 1 1/2 cups cooked spicy buffalo chicken; 1/3 cup blue cheese crumbles; extra scallions
- Optional “Street Corn”: 1 cup charred corn; 1/2 cup roasted peppers; 1/3 cup queso fresco; cilantro
- Green Sauce: 4 cups spinach + 1/2–1 cup basil blended with 3/4 cup milk
Instructions
- Heat oven to 400°F and butter a 9×13-inch baking dish.
- Boil pasta in salted water to 1 minute shy of al dente; drain well.
- Warm milk and cream until steamy.
- In a large pot, melt butter over medium heat; whisk in flour 2–3 minutes to a blond roux.
- Stream in warm dairy, whisking until smooth and thick enough to coat a spoon, 4–6 minutes.
- Off heat, whisk in half the cheddar and all Colby Jack (and Gruyère if using) until glossy; stir in sour cream, salt, dry mustard, pepper, nutmeg, Worcestershire, and cayenne; taste and adjust.
- Fold in pasta; transfer to the dish; top evenly with remaining cheddar.
- For “Loaded Beast,” scatter bacon, fried shallots, and roasted garlic over the top; reserve green onions for garnish.
- Bake 25–30 minutes until bubbling; rest 10 minutes; broil 1–2 minutes for deeper crust if desired.
- Garnish with green onions or cilantro and serve hot.
Notes
- Always grate cheese fresh for a smoother melt and fewer clumps.
- Warming the dairy prevents seizing and keeps the sauce silky and stable in the oven.
- Resting the bake keeps slices neat and the interior ultra-creamy.
- Assemble up to 24 hours in advance; cover and refrigerate; bake 30–40 minutes from cold.
- Store leftovers airtight 3–4 days; reheat covered at 325°F with a splash of milk; stir once midway for even creaminess.
- Prep Time: 20 mins
- Cook Time: 30 mins
- Category: Main Dish
- Method: Baking
- Cuisine: American
Nutrition
- Serving Size: 1 cup
- Calories: 560
- Sugar: 5g
- Sodium: 680mg
- Fat: 30g
- Saturated Fat: 18g
- Unsaturated Fat: 12g
- Trans Fat: 0g
- Carbohydrates: 48g
- Fiber: 2g
- Protein: 24g
- Cholesterol: 90mg

