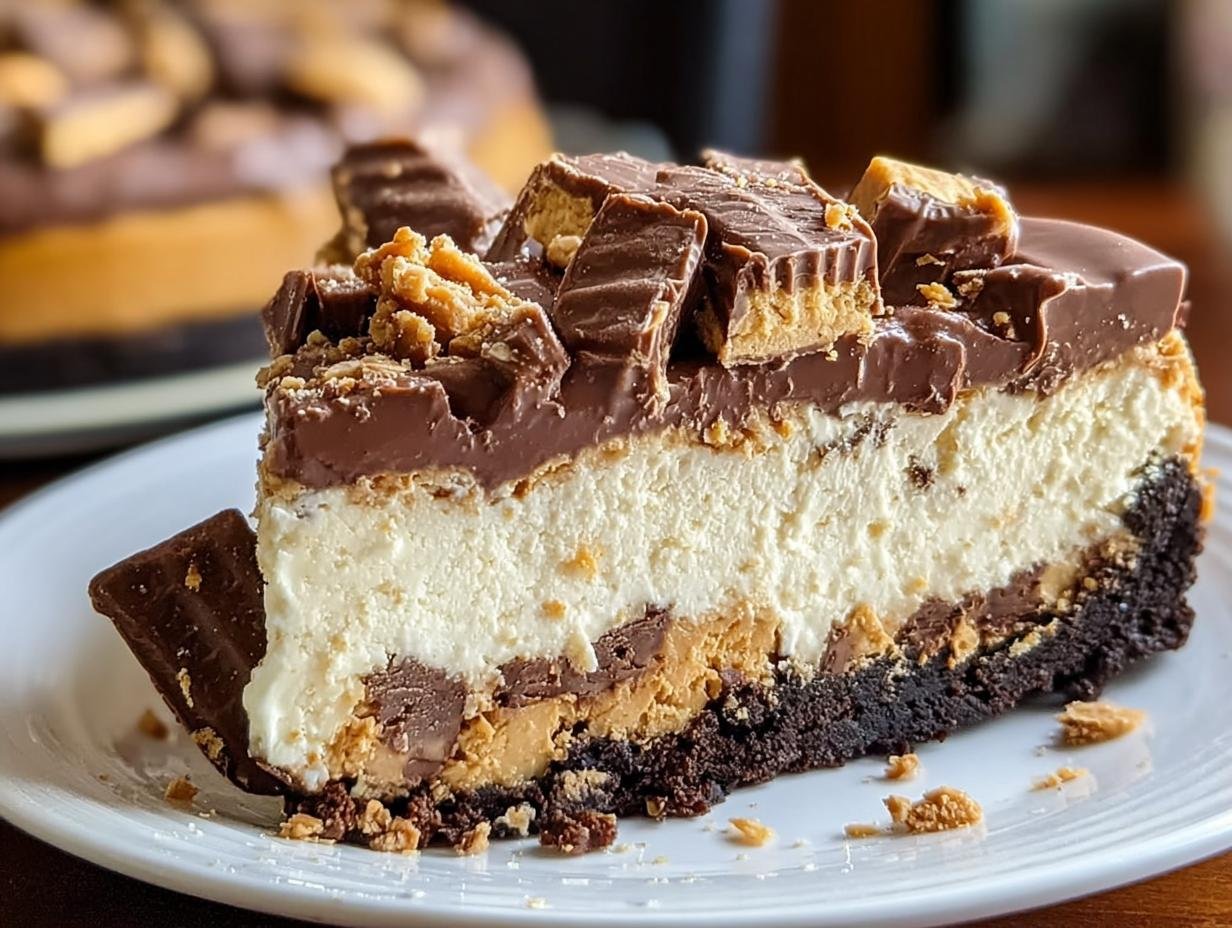
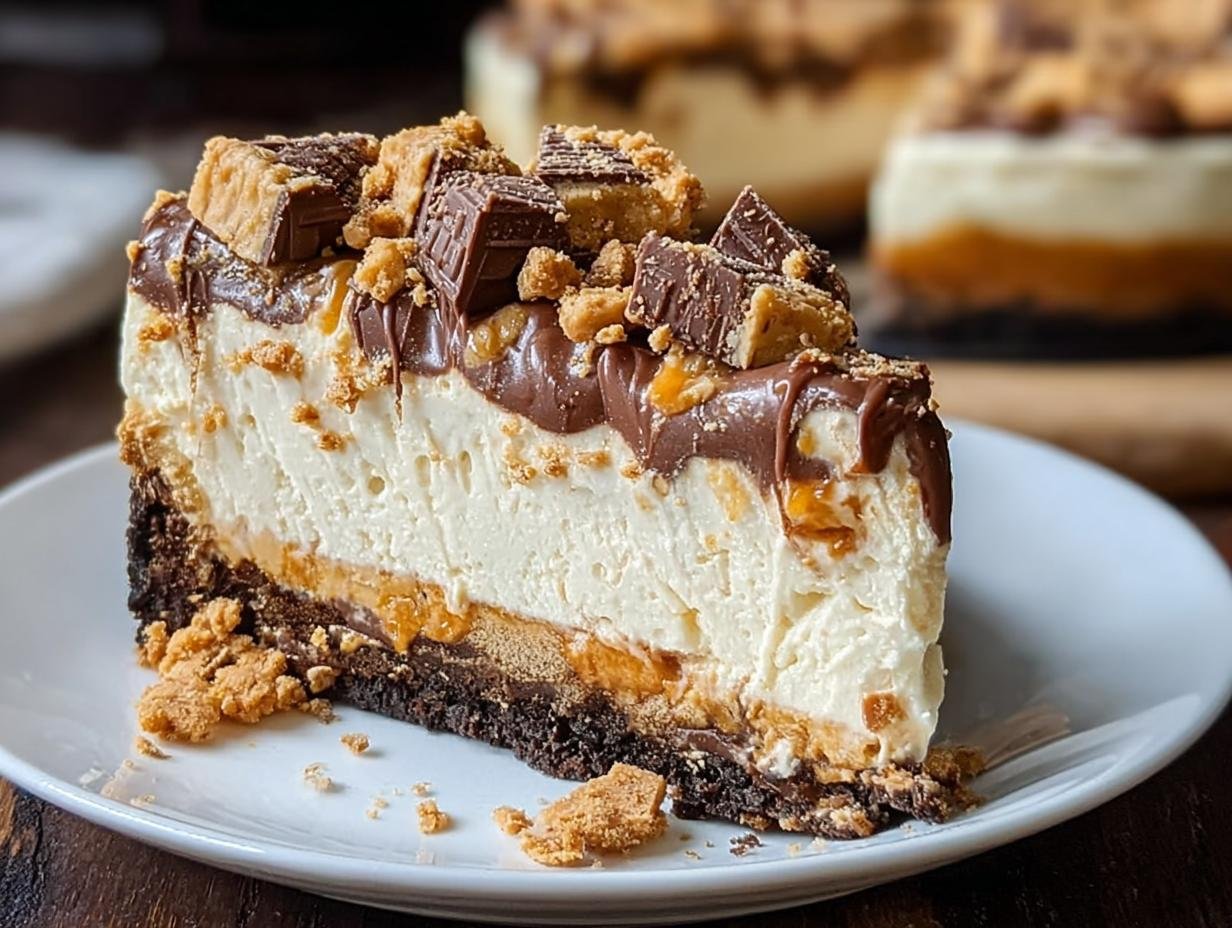
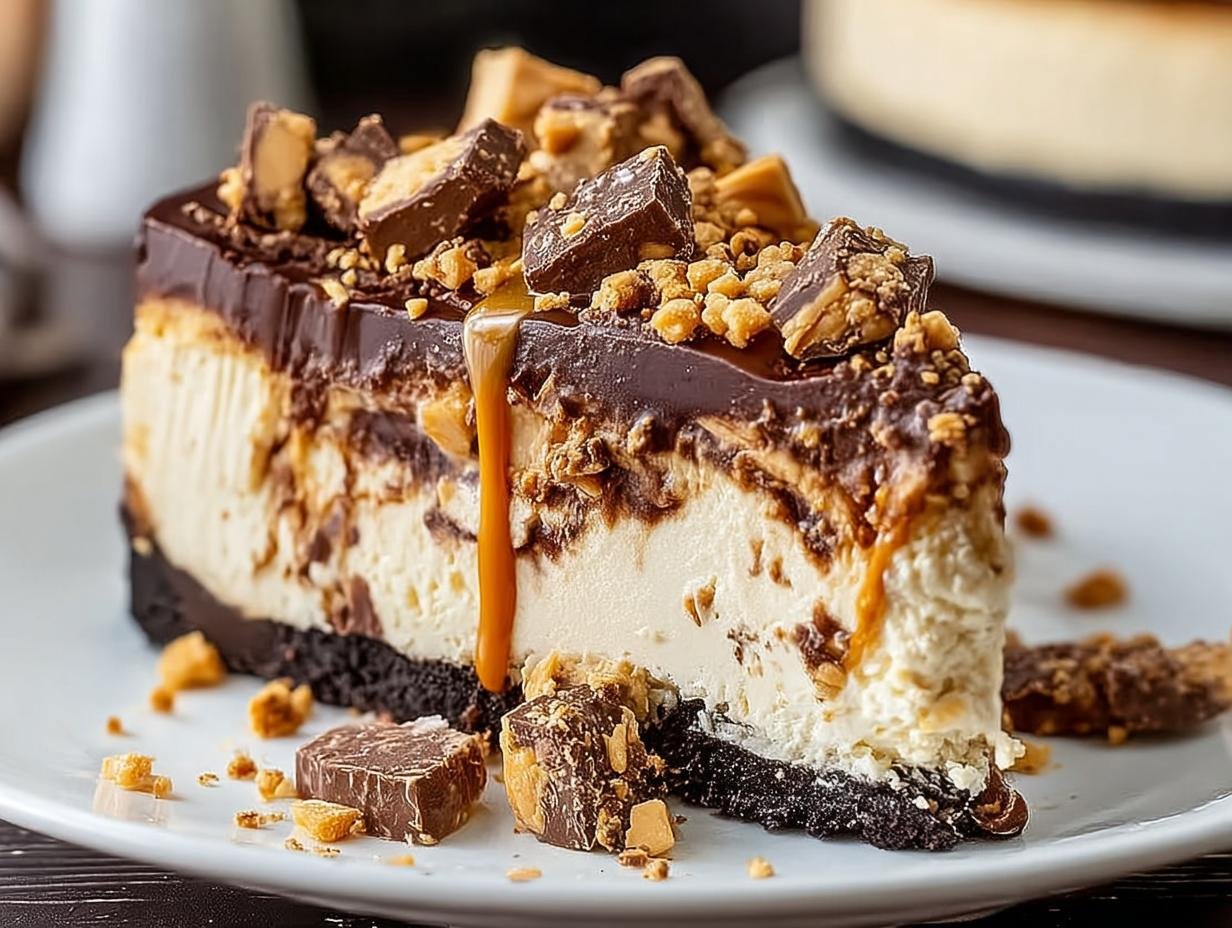
Incredible Butterfinger Cheesecake has been my go-to dessert for celebrations ever since I first tried making it. I still remember the first time I served this homemade Butterfinger cheesecake at a family gathering; the look on everyone’s faces as they took their first bite was pure joy! The combination of creamy, dreamy cheesecake with those irresistible crunchy, peanut-buttery Butterfinger pieces is just magical. It’s a rich Butterfinger cheesecake that truly satisfies. This Butterfinger cheesecake recipe is surprisingly simple, and the aroma alone while it bakes is enough to make your mouth water. Let’s get cooking!
Why You’ll Love This Incredible Butterfinger Cheesecake
This dessert is a guaranteed crowd-pleaser for so many reasons:
- The taste is simply divine – a perfect balance of creamy cheesecake and the unique, satisfying crunch of Butterfinger candy bars.
- It’s remarkably easy to make, living up to its reputation as an easy Butterfinger cheesecake recipe.
- While it’s a treat, the creamy Butterfinger cheesecake filling is made with wholesome ingredients like cream cheese and eggs.
- It’s surprisingly budget-friendly, especially when you use fun-size bars, making it an accessible indulgence.
- This easy Butterfinger cheesecake recipe is perfect for family gatherings; even picky eaters adore it!
- The minimal prep time means you can whip up this homemade Butterfinger cheesecake without spending all day in the kitchen.
- It’s visually stunning with its signature topping, making it a showstopper for any occasion.
- It’s a versatile dessert that can be enjoyed year-round.
Ingredients for the Best Butterfinger Cheesecake
Here’s what you’ll need to create this amazing Butterfinger candy bar cheesecake:
- 1 ¾ cups crushed graham crackers – this forms the perfect base for our dessert
- ½ cup granulated sugar – sweetens the crust
- ½ cup unsalted butter, melted – binds the crust ingredients together
- 3 (8-ounce) packages cream cheese, softened – the foundation of our creamy cheesecake filling; make sure it’s at room temperature for smoothness
- 1 cup granulated sugar – for sweetening the rich cheesecake
- 1 teaspoon vanilla extract – enhances the overall flavor profile
- 3 large eggs – help set the cheesecake and add richness
- ½ cup sour cream – contributes to the signature creamy texture
- 6 fun-size Butterfinger candy bars, chopped – the star ingredient, providing that iconic crunch and peanut butter flavor
- 2 fun-size Butterfinger candy bars, crushed – for a delightful topping
- Whipped cream (optional) – for an extra touch of indulgence
How to Make Homemade Butterfinger Cheesecake
- Step 1: First things first, let’s get that oven preheated to 325°F (160°C). While it’s warming up, grab a bowl and mix together the crushed graham crackers, ½ cup of granulated sugar, and the melted butter. You want it to look like damp sand.
- Step 2: Press this crumbly mixture evenly into the bottom of a 9-inch springform pan. I like to use the bottom of a glass to get a nice, firm layer. Bake this crust for about 10 minutes, then set it aside to cool. This step is crucial for a good base!
- Step 3: Now for the star of the show: the cheesecake filling! In a large bowl, beat the softened cream cheese with your electric mixer until it’s wonderfully smooth and creamy. Seriously, no lumps allowed here for that truly creamy Butterfinger cheesecake texture.
- Step 4: Gradually add 1 cup of granulated sugar and the vanilla extract to the cream cheese, mixing until everything is just combined. Don’t overmix at this stage; we want to keep it light.
- Step 5: Add the eggs one at a time, beating just until each egg is incorporated. Be gentle! Overbeating after adding eggs can lead to cracks.
- Step 6: Stir in the sour cream until the filling is smooth and luscious. This is where that signature creamy Butterfinger cheesecake filling starts to really come together.
- Step 7: Gently fold in the 6 chopped fun-size Butterfinger candy bars. You want them to be evenly distributed throughout the filling, like little pockets of crunchy goodness.
- Step 8: Pour this glorious Butterfinger cheesecake filling over the cooled graham cracker crust. Smooth the top with a spatula so it’s even.
- Step 9: Bake for 50-60 minutes. You’ll know it’s ready when the edges are set, but the center still has a slight wobble.
- Step 10: Turn off the oven, crack the door open slightly, and let the cheesecake cool in the oven for about an hour. This helps prevent cracking. Then, let it cool completely at room temperature.
- Step 11: Once it’s no longer warm, cover it and pop it into the refrigerator for at least 2.5 to 3 hours, or even better, overnight. This chilling time is essential for the cheesecake to fully set and for the flavors to meld beautifully.
- Step 12: When you’re ready to serve, carefully remove the sides of the springform pan. Place your masterpiece on a serving plate, top with crushed Butterfingers and whipped cream if you like, and prepare for the compliments!

Pro Tips for the Best Butterfinger Cheesecake Dessert
Want to elevate your dessert game? Here are a few tricks I’ve learned to make this Butterfinger cheesecake truly spectacular:
- Always use room temperature cream cheese and eggs. This is key for a super smooth, creamy texture and prevents lumps in your filling.
- Don’t overmix the batter once you add the eggs. Overbeating incorporates too much air, which can cause the cheesecake to crack as it bakes.
- For clean slices, use a sharp knife dipped in hot water and wiped dry between each cut. It makes presentation so much neater!
- If you don’t have graham crackers, digestive biscuits or even vanilla wafers can work for the crust.
What’s the secret to perfect Butterfinger cheesecake?
The real magic for a perfect, decadent Butterfinger cheesecake lies in the gentle handling of the batter and the slow cooling process. Using room temperature ingredients and avoiding overmixing are crucial steps to achieving that incredibly smooth, rich texture that makes this dessert so special. For more tips on baking, check out these deliciousness tips.
Can I make Butterfinger cheesecake ahead of time?
Absolutely! This Butterfinger cheesecake is even better when made a day in advance. Prepare it completely, then cover and refrigerate overnight. This allows the flavors to meld beautifully, making for an even more delicious dessert. You can find more make-ahead recipes here.
How do I avoid common mistakes with Butterfinger cheesecake?
The most common pitfalls are overmixing the batter, which leads to cracks, and cooling the cheesecake too quickly, which can also cause cracks or a sunken center. Always mix gently after adding eggs, and allow the cheesecake to cool gradually. Understanding ingredient interactions can help, like the difference between zucchini and cucumber.
Best Ways to Serve Your Incredible Butterfinger Cheesecake
This decadent dessert is a showstopper on its own, but a few serving touches can make it even more memorable. My favorite way to present this incredible Butterfinger cheesecake is with a generous dollop of fluffy whipped cream right on top. It adds a lovely lightness that contrasts beautifully with the rich filling and crunchy candy bars.
For an extra layer of flavor and texture, I love to sprinkle a bit more crushed Butterfinger cheesecake topping over the whipped cream. If you want to serve it alongside something, a simple fresh berry salad, perhaps with raspberries or strawberries, offers a refreshing tartness that cuts through the sweetness. It’s a delightful pairing that complements the creamy, peanut-buttery goodness. Consider trying a cozy breakfast idea to complement your dessert.

Nutrition Facts for Butterfinger Cheesecake
Here’s a look at what you can expect in each slice of this delicious dessert:
- Calories: 350 kcal
- Fat: 22g
- Saturated Fat: 12g
- Protein: 6g
- Carbohydrates: 35g
- Fiber: 1g
- Sugar: 30g
- Sodium: 250mg
Nutritional values are estimates and may vary based on specific ingredients used in your incredible Butterfinger cheesecake. For more insights into nutrition, you might be interested in fibermaxxing.
How to Store and Reheat Butterfinger Cheesecake
Once your delicious Butterfinger cheesecake is completely cooled, it’s time to think about storage. For enjoying this treat over the next few days, cover the cheesecake tightly with plastic wrap or transfer it to an airtight container. It will stay wonderfully fresh in the refrigerator for about 3 to 4 days. This makes it a great option if you’re planning an event and want to get a head start, as it’s part of what makes an easy Butterfinger cheesecake recipe so convenient.
If you find yourself with extra cheesecake and want to preserve it for longer, freezing is a fantastic option. Wrap individual slices securely in plastic wrap, then in aluminum foil, to prevent freezer burn. Properly stored, your homemade Butterfinger cheesecake can last in the freezer for up to 3 months. To reheat, simply unwrap the frozen slice and let it thaw in the refrigerator overnight. You can then enjoy it chilled or let it sit at room temperature for about 15-20 minutes before serving.
Frequently Asked Questions About Butterfinger Cheesecake
What is Butterfinger cheesecake?
A Butterfinger cheesecake is a delightful dessert that combines the creamy, rich texture of classic cheesecake with the unmistakable crunchy, peanut-buttery flavor of Butterfinger candy bars. It typically features a graham cracker crust, a smooth cheesecake filling studded with chopped Butterfingers, and often a topping of more crushed Butterfingers, creating a truly decadent treat.
Why is Butterfinger cheesecake popular?
This dessert is incredibly popular because it perfectly balances familiar comfort with exciting new flavors. The unique taste and crunch of Butterfinger candy bars are a beloved combination for many, and when paired with smooth, creamy cheesecake, it creates a dessert that’s both nostalgic and innovative. It’s a fantastic way to enjoy the classic candy in a new, celebratory format.
Can I use other candy bars in this recipe?
While this recipe is specifically designed for Butterfinger, you can certainly experiment with other crunchy, chocolate-covered candies for variations. However, the distinctive peanut butter flavor of Butterfinger is what truly makes this cheesecake special. If you want to try something different, a Butterfinger peanut butter cheesecake variation could be delicious, perhaps by adding a swirl of peanut butter to the filling.
How do I get the best texture for my Butterfinger cheesecake?
To achieve the best texture for your creamy Butterfinger cheesecake, ensure your cream cheese and eggs are at room temperature. Avoid overmixing the batter once the eggs are added, as this can lead to cracks. Gently folding in the chopped Butterfingers also helps maintain pockets of crunch throughout the smooth filling.
Variations of Butterfinger Cheesecake You Can Try
Once you’ve mastered the classic, you might want to explore some fun twists on this beloved dessert. One popular adaptation is the no-bake Butterfinger cheesecake, which skips the oven entirely and uses a chilled, no-bake filling for an even quicker preparation. This is perfect for those hot summer days when you want a delicious treat without heating up the kitchen! You can find more recipe ideas here.
For a deeper, more intense flavor, consider a Butterfinger peanut butter cheesecake. You can achieve this by adding a few tablespoons of creamy peanut butter directly into the cheesecake filling along with the cream cheese and sugar. Another idea is to swap out the graham cracker crust for an Oreo crust or even a chocolate cookie crust for a richer base. And don’t forget, you can also experiment with different types of Butterfinger bars, like the Butterfinger Peanut Butter Cups, for an extra peanut butter punch! For a healthier option, consider a natural Mounjaro recipe for weight loss.
Print
Incredible Butterfinger Cheesecake: 1 Joyful Bite
- Total Time: 4 hours 15 minutes
- Yield: 12 servings 1x
- Diet: Vegetarian
Description
An incredible ultimate recipe for Butterfinger Cheesecake, combining creamy cheesecake with the crunchy, distinctive flavor of Butterfinger candy bars. This dessert is easy to make, perfect for any occasion, and visually stunning.
Ingredients
- For the Crust:
- 1 ¾ cups crushed graham crackers
- ½ cup granulated sugar
- ½ cup unsalted butter, melted
- For the Cheesecake Filling:
- 3 (8-ounce) packages cream cheese, softened
- 1 cup granulated sugar
- 1 teaspoon vanilla extract
- 3 large eggs
- ½ cup sour cream
- 6 fun-size Butterfinger candy bars, chopped
- For Topping:
- 2 fun-size Butterfinger candy bars, crushed
- Whipped cream (optional)
Instructions
- Preheat your oven to 325°F (160°C).
- In a bowl, combine the crushed graham crackers, granulated sugar, and melted butter. Mix well.
- Press the mixture into the bottom of a 9-inch springform pan, creating an even layer. Bake for 10 minutes, then allow to cool.
- In a large bowl, beat the cream cheese with an electric mixer until smooth.
- Add the granulated sugar and vanilla extract, mixing until combined.
- Add each egg, one at a time, blending well after each addition until fully incorporated.
- Mix in the sour cream until the filling is creamy and smooth.
- Gently fold in the chopped Butterfinger candy bars until evenly distributed in the filling.
- Pour the cheesecake filling over the cooled graham cracker crust, smoothing the top.
- Bake for 50-60 minutes. The cheesecake should be set around the edges but slightly jiggly in the center.
- Remove the cheesecake from the oven and let it cool at room temperature for about an hour.
- Refrigerate the cheesecake for at least 2.5 to 3 hours or overnight to fully set.
- Once chilled, remove the springform pan and place the cheesecake on a serving plate.
- Top with crushed Butterfinger candy bars and whipped cream if desired.
Notes
- Use room temperature ingredients for a creamier consistency.
- Crush Butterfingers into small, uniform pieces but avoid powdering them completely for even distribution.
- When adding eggs, mix until just combined to maintain a light and airy cheesecake.
- For gluten-free, use gluten-free graham crackers.
- Can be made a day ahead.
- For clean cuts, dip a sharp knife in hot water, wipe dry, and cut. Repeat for each slice.
- Prep Time: 30 minutes
- Cook Time: 1 hour
- Category: Dessert
- Method: Baked
- Cuisine: American
Nutrition
- Serving Size: 1 slice (1/12 of cheesecake)
- Calories: 350 kcal
- Sugar: 30g
- Sodium: 250mg
- Fat: 22g
- Saturated Fat: 12g
- Unsaturated Fat: 10g
- Trans Fat: 0.5g
- Carbohydrates: 35g
- Fiber: 1g
- Protein: 6g
- Cholesterol: 70mg

