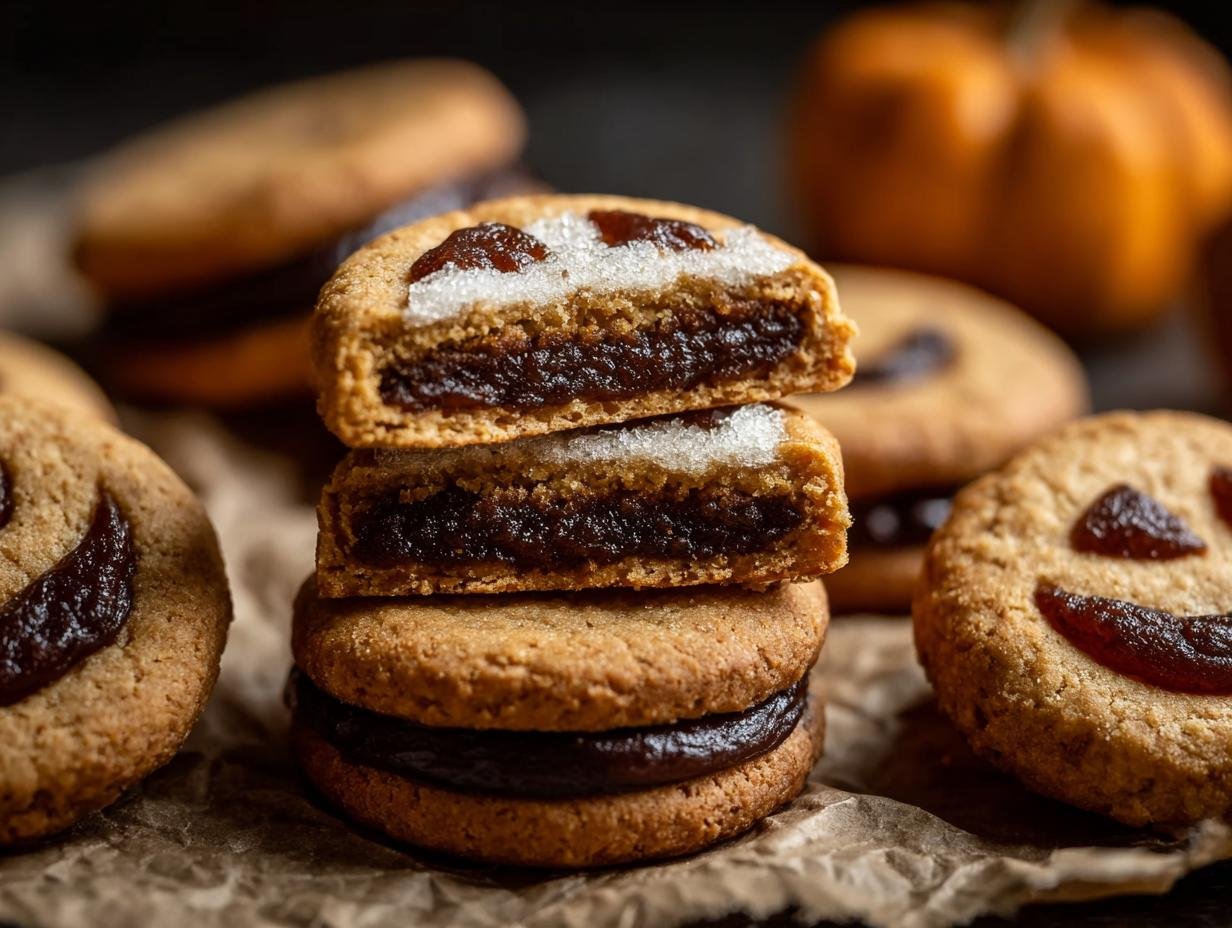
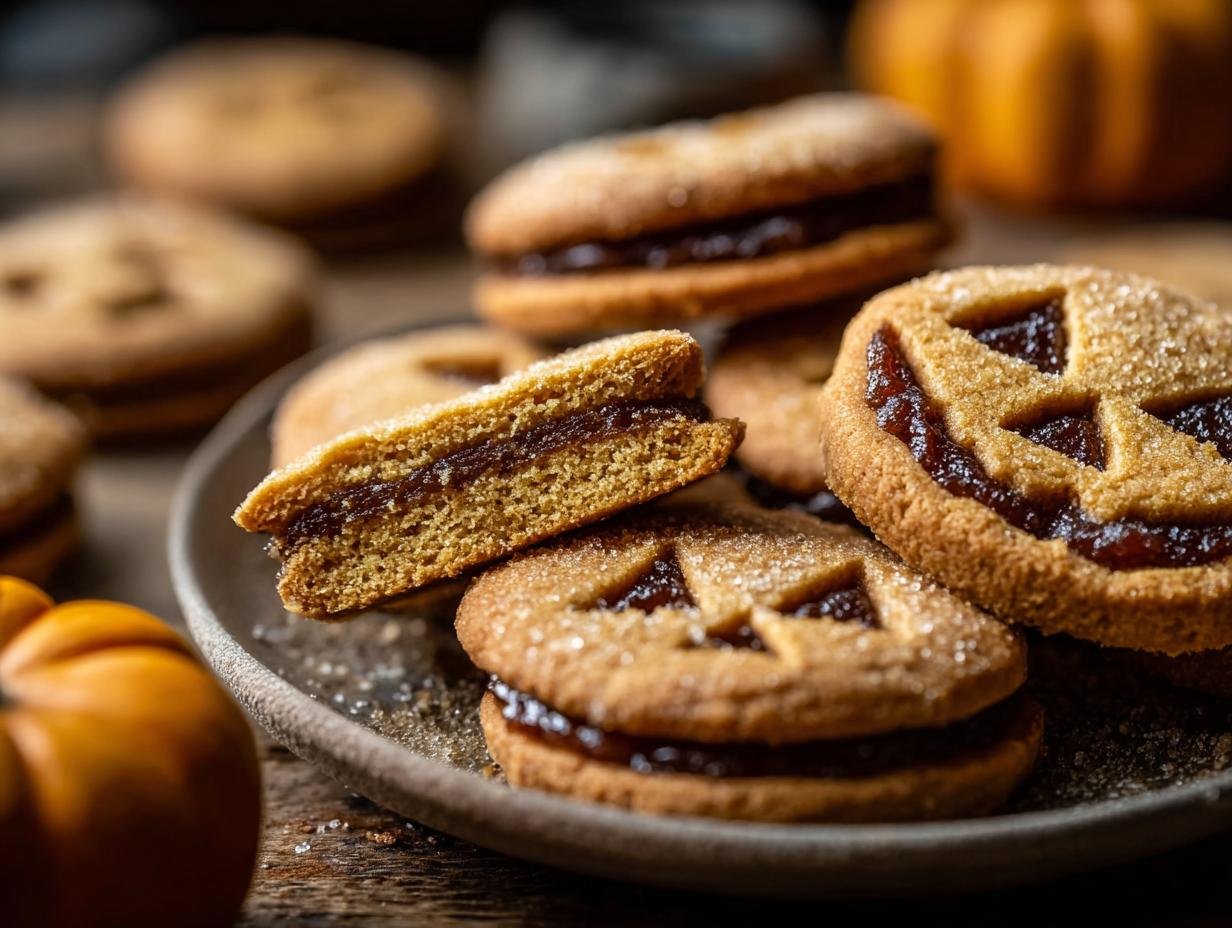
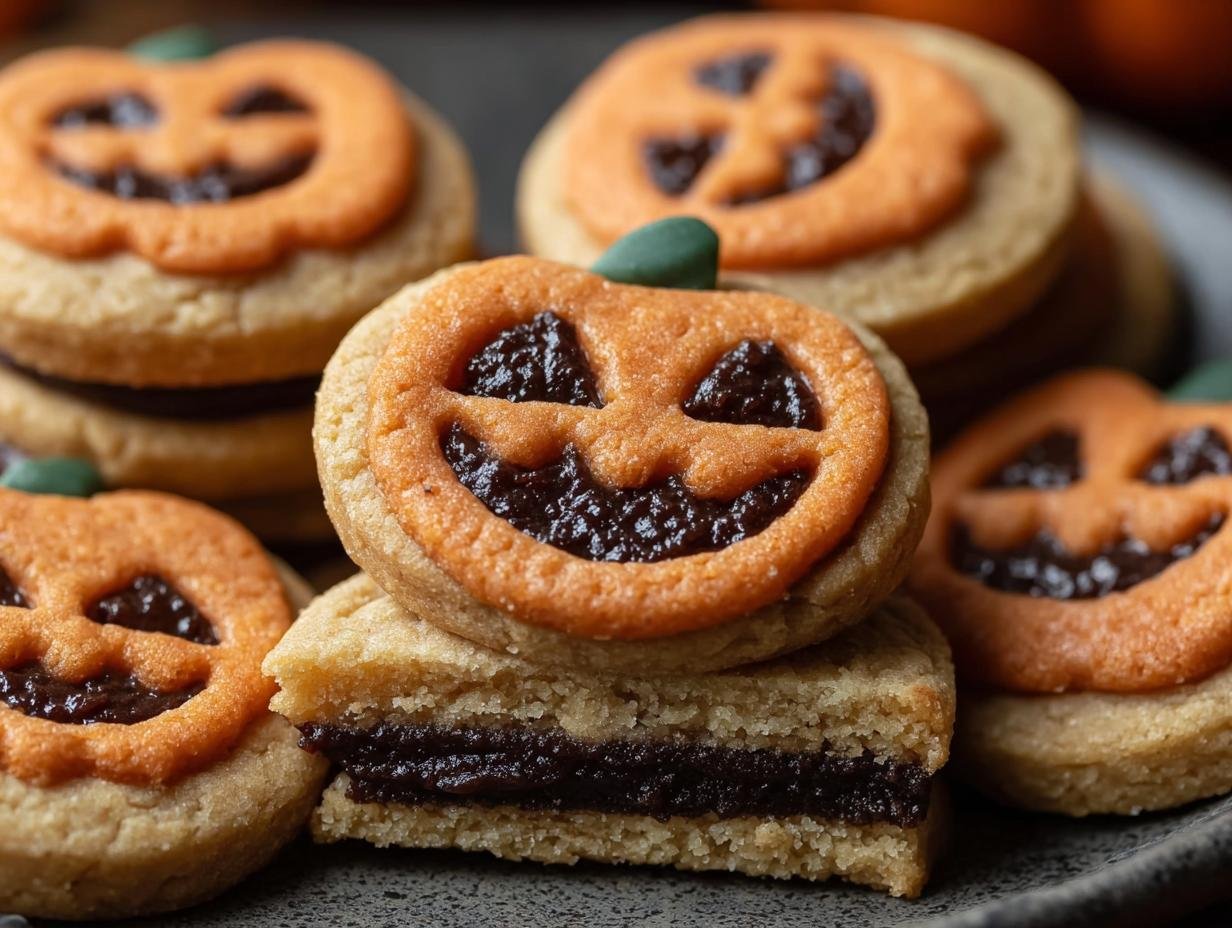
Halloween Date Filled Cookies have been a staple in my family’s autumn baking for years, bringing a delightful mix of chewy texture and sweet, gooey goodness. I remember my mom crafting these every October, the kitchen filling with the warm, comforting aroma of spices and baked dough. These aren’t just any cookies; they’re a special kind of Halloween cookie recipe that feels both classic and festive. They have a wonderfully soft bite with a surprise burst of sweet, caramelized dates right in the center. If you’re looking for a truly delicious and satisfying treat this spooky season, these homemade Halloween date cookies are an absolute must-try. Let’s get baking!
Why You’ll Love These Halloween Date Filled Cookies
These aren’t just any cookies; they’re a delightful experience waiting to happen! Here’s why you’ll be reaching for this recipe again and again:
- Irresistible Texture: They boast a perfectly chewy cookie exterior that gives way to a wonderfully gooey, sweet date center.
- Festive Fun: These are ideal for your Halloween cookie baking ideas, making them a hit at parties and for trick-or-treaters.
- Simple to Make: Despite their fancy stuffed appearance, they’re surprisingly easy, fitting into your quick Halloween date cookies plans.
- Classic Comfort: The combination of warm spices and sweet dates evokes a comforting, homemade feel that everyone adores.
- Versatile for Decorating: Their shape is perfect for adding spooky Halloween touches or simply enjoying their natural charm.
- Satisfy Your Sweet Tooth: The natural sweetness of the dates makes these a satisfying treat without being overly sugary.
- Crowd-Pleaser Guarantee: Whether you’re baking for family or a crowd, these are always a guaranteed hit.
Ingredients for Halloween Date Filled Cookies
Gather these simple ingredients to create your delicious Halloween date cookies. The combination of tender cookie dough and a rich date filling is what makes this recipe so special. You’ll find that using quality ingredients really makes a difference in the final flavor and texture of these homemade Halloween date cookies.
- 1 cup shortening – provides a tender, chewy texture
- 1/2 cup granulated sugar – for sweetness in the cookie dough
- 1/2 cup brown sugar – adds moisture and a slight caramel note
- 1 egg – acts as a binder for the dough
- 3 tablespoons milk – contributes to the dough’s softness
- 1 teaspoon vanilla extract – enhances the overall flavor
- 3 cups sifted all-purpose flour – the structure of our cookie
- 1/2 teaspoon salt – balances the sweetness
- 1/2 teaspoon baking soda – helps the cookies rise slightly
- 2 cups chopped dates – the star of our sweet, gooey filling
- 1/2 cup sugar – for the date filling
- 1/2 cup water – to help cook down the dates
- 2 tablespoons lemon juice – brightens the date filling and prevents crystallization
- 1/4 teaspoon salt – balances the sweetness in the filling
How to Make Halloween Date Filled Cookies
Let’s dive into creating these delightful, spooky date cookies! This recipe for homemade Halloween date cookies is straightforward and yields incredibly delicious results. Follow these steps carefully to achieve that perfect chewy texture and gooey center every time.
Preparing the Cookie Dough
First, in a large bowl, cream together 1 cup shortening with 1/2 cup granulated sugar and 1/2 cup brown sugar until the mixture is light and fluffy. Next, beat in 1 egg, 3 tablespoons milk, and 1 teaspoon vanilla extract until everything is well combined. In a separate bowl, whisk together 3 cups sifted all-purpose flour, 1/2 teaspoon salt, and 1/2 teaspoon baking soda.
Crafting the Sweet Date Filling
Now, let’s prepare that irresistible date filling. In a medium saucepan, combine 2 cups chopped dates, 1/2 cup sugar, and 1/2 cup water. Bring this mixture to a boil, then reduce the heat, cover, and let it simmer gently for about 5 minutes, stirring occasionally until the dates soften. Stir in 2 tablespoons lemon juice and 1/4 teaspoon salt. Let this sweet date filling cool completely before using.

Assembling and Baking the Spooky Date Cookies
Preheat your oven to 375°F (190°C). On a lightly floured surface, roll out half of the chilled cookie dough to just under 1/8 inch thick. Use your favorite Halloween cookie cutters, like pumpkins or bats, to cut out shapes. Place about one tablespoon of the cooled date filling onto the center of each cookie. Top with another cookie round, pressing the edges firmly with a fork to seal these spooky date cookies securely. Arrange them on an ungreased baking sheet and bake for 10–12 minutes, or until they’re lightly golden brown. Let them cool on the sheet for a few minutes before moving them to a wire rack.
Pro Tips for the Best Halloween Date Filled Cookies
Want to make sure your Halloween cookies are absolutely perfect? I’ve picked up a few tricks over the years that guarantee success. These simple tips will elevate your homemade Halloween date cookies from good to unforgettable!
- Always chill your cookie dough thoroughly; it makes rolling and cutting so much easier and prevents the cookies from spreading too much.
- Don’t overfill the cookies! A tablespoon of filling is usually plenty to avoid a messy bake.
- Using festive cookie cutters is fun, but you can also press a fork around the edges to seal and create a decorative pattern.
- Consider adding a pinch of cinnamon or nutmeg to the date filling for an extra layer of warm, comforting flavor.
What’s the secret to perfect Halloween Date Filled Cookies?
The real secret lies in the date filling’s consistency and chilling the dough. A slightly cooled, well-simmered date mixture prevents it from leaking, and chilled dough maintains its shape for those perfect spooky date cookies. For more insights on maintaining dough consistency, you might find information on baking science helpful.
Can I make Halloween Date Filled Cookies ahead of time?
Absolutely! You can prepare the dough and the date filling up to 2 days in advance and store them separately in the refrigerator. Assemble the cookies just before baking for the freshest result. If you’re interested in other make-ahead recipes, check out these delicious apple cinnamon overnight oats.
How do I avoid common mistakes with Halloween Date Filled Cookies?
The most common pitfalls are under-chilled dough causing cookies to spread, or overfilling which leads to leaks. Ensure your dough is firm and use only about a tablespoon of filling per cookie. Understanding ingredient ratios is key, much like in creating a perfect multigrain bread.
Best Ways to Serve Halloween Date Filled Cookies
These delightful Halloween sweets with dates are perfect for so many occasions! Beyond just a party treat, they pair wonderfully with a warm mug of spiced apple cider for a cozy fall afternoon snack. For a more elaborate dessert platter, arrange them alongside a scoop of vanilla bean ice cream or a dollop of whipped cream. They also make a fantastic addition to a homemade Halloween cookie box, offering a unique, comforting flavor that stands out. Don’t be afraid to get creative with your presentation – maybe a dusting of powdered sugar to mimic a spooky mist!
Nutrition Facts for Halloween Date Filled Cookies
These homemade Halloween date cookies are a delightful treat! Here’s a look at the estimated nutritional breakdown per cookie, so you can enjoy these spooky date cookies mindfully:
- Calories: 120
- Fat: 5g
- Saturated Fat: 2g
- Unsaturated Fat: 2g
- Trans Fat: 0g
- Carbohydrates: 18g
- Fiber: 1g
- Sugar: 12g
- Protein: 1g
- Cholesterol: 10mg
- Sodium: 50mg
Nutritional values are estimates and may vary based on specific ingredients used in your Halloween cookie baking ideas. For more information on fiber intake, consider reading about fibermaxxing.

How to Store and Reheat Halloween Date Filled Cookies
Properly storing your delicious Halloween date filled cookies ensures they stay fresh and chewy for your guests. After baking, let your spooky date cookies cool completely on a wire rack. This is crucial to prevent any condensation that could make them soggy. Once cooled, store them in an airtight container at room temperature for up to 3-4 days. For longer storage, these homemade Halloween date cookies freeze beautifully! Wrap them well in plastic wrap, then place them in a freezer-safe bag or container. They’ll keep their delightful texture in the freezer for up to 3 months. When you’re ready to enjoy them again, simply thaw them overnight in the refrigerator or gently reheat them in a low oven (around 300°F or 150°C) for a few minutes to bring back that freshly baked warmth.
Frequently Asked Questions About Halloween Date Filled Cookies
What makes these Halloween Date Filled Cookies “spooky”?
The “spooky” element comes from how you decorate them! While the base recipe is a classic date-filled cookie, you can use Halloween-themed cookie cutters like bats, ghosts, or pumpkins to shape the dough. You can also add a dusting of powdered sugar for a ghostly effect or even pipe on some simple Halloween designs once they’ve cooled.
Can I make these Halloween cookies gluten-free or vegan?
Yes, you can adapt these Halloween cookie recipes! For gluten-free Halloween date cookies, substitute the all-purpose flour with your favorite gluten-free blend, ensuring it contains a binder like xanthan gum. For vegan Halloween date cookies, replace the butter with vegan butter or shortening, use a flax egg (1 tablespoon flaxseed meal + 3 tablespoons water, let sit for 5 minutes) instead of the egg, and swap the milk for a plant-based alternative like almond or soy milk. If you’re exploring vegan baking, you might find resources on vegan recipe adaptations useful.
What’s the best way to ensure the date filling doesn’t leak out of my Halloween Date Filled Cookies?
The key to preventing leaks in your homemade Halloween date cookies is to ensure the filling is cooled completely and not overfilled. Also, pressing the edges of the top and bottom cookie dough rounds together firmly with a fork creates a good seal. If your dough is properly chilled, it will hold its shape better around the filling during baking, making them perfect spooky date cookies.
Are these considered healthy Halloween cookie recipes?
While they are made with natural sweeteners from dates, these are still cookies and should be enjoyed in moderation. They are a healthier option compared to many store-bought Halloween sweets with dates due to the natural sweetness and fiber from the dates, and you control the ingredients. You can further boost their health profile by using whole wheat flour or adding oats to the dough for more fiber. For other healthy baking ideas, consider this whole roasted cauliflower recipe.
Variations of Halloween Date Filled Cookies You Can Try
Looking to switch things up? These Halloween sweets with dates are wonderfully adaptable! You can easily create delicious variations to suit different tastes and dietary needs. Here are a few ideas to inspire your next batch of homemade Halloween date cookies:
- Oatmeal Twist: For a heartier texture, stir 1 cup of rolled oats into the cookie dough along with the flour. This creates a chewy, slightly rustic cookie that pairs beautifully with the sweet date filling.
- Nutty Delight: Add 1/2 cup of finely chopped walnuts or pecans to the date filling mixture before simmering. The nuts add a wonderful crunch and a complementary flavor to the sweet dates, making them even more decadent.
- Gluten-Free Option: Swap out the all-purpose flour for a good quality gluten-free baking blend that contains xanthan gum. Ensure your blend works well for cookies, and you’ll have delightful gluten-free Halloween date cookies.
- Vegan Adaptation: To make these vegan Halloween date cookies, use vegan butter or shortening, replace the egg with a flax egg (1 tbsp flaxseed meal + 3 tbsp water, rested), and use plant-based milk like almond or soy milk.

Amazing Halloween Date Filled Cookies Recipe
- Total Time: 1 hour 12 minutes
- Yield: 24 cookies 1x
- Diet: Vegetarian
Description
Soft, chewy Halloween Date Filled Cookies with a sweet, gooey date center. These classic stuffed cookies get a festive twist, perfect for fall baking and Halloween parties.
Ingredients
- Cookie Dough:
- 1 cup shortening
- 1/2 cup granulated sugar
- 1/2 cup brown sugar
- 1 egg
- 3 tablespoons milk
- 1 teaspoon vanilla extract
- 3 cups sifted all-purpose flour
- 1/2 teaspoon salt
- 1/2 teaspoon baking soda
- Date Filling:
- 2 cups chopped dates
- 1/2 cup sugar
- 1/2 cup water
- 2 tablespoons lemon juice
- 1/4 teaspoon salt
Instructions
- Preheat oven to 375°F (190°C).
- In a large bowl, cream together shortening and both sugars until fluffy.
- Add the egg, milk, and vanilla extract. Mix until well combined.
- In a separate bowl, sift together the all-purpose flour, baking soda, and salt.
- Gradually add the dry ingredients to the wet mixture, blending until a smooth dough forms.
- Chill the cookie dough for at least one hour to make it easier to handle.
- Prepare the date filling: In a saucepan, combine the chopped dates, sugar, and water.
- Bring the mixture to a boil, then reduce heat, cover, and let simmer for 5 minutes, stirring occasionally.
- Stir in the lemon juice and salt. Let the date filling cool completely.
- On a lightly floured surface, roll out half of the chilled dough to just under 1/8 inch thickness.
- Use a 2 1/2-inch round cookie cutter to cut out shapes. For a Halloween theme, use cutters like pumpkins, bats, or ghosts.
- Place about one tablespoon of the cooled date filling in the center of each cookie base.
- Top each filled cookie with another cookie round.
- Press the edges of the cookies together with a fork to seal them securely.
- Arrange the assembled Halloween date filled cookies on an ungreased baking sheet.
- Bake for 10–12 minutes, or until the cookies are lightly golden brown.
- Allow the cookies to cool on the baking sheet for a few minutes before transferring them to a wire rack to cool completely.
Notes
- Chilling the dough thoroughly makes it easier to roll and cut.
- Avoid overfilling the cookies to prevent the filling from leaking out during baking.
- For a fun, spooky Halloween touch, use festive cookie cutters or cut small shapes into the top cookie layer.
- Using parchment paper on your baking sheets can simplify cleanup.
- Consider adding 1 cup of rolled oats to the dough for an oatmeal version.
- Chopped walnuts or pecans can be added to the date filling for a nutty twist.
- A drizzle of melted dark chocolate over the cooled cookies adds an indulgent finish.
- Prep Time: 20 minutes
- Cook Time: 12 minutes
- Category: Dessert
- Method: Baking
- Cuisine: American
Nutrition
- Serving Size: 1 cookie
- Calories: 120
- Sugar: 12g
- Sodium: 50mg
- Fat: 5g
- Saturated Fat: 2g
- Unsaturated Fat: 2g
- Trans Fat: 0g
- Carbohydrates: 18g
- Fiber: 1g
- Protein: 1g
- Cholesterol: 10mg

