Peanut Butter High Protein Ice Cream — No-Churn Recipe
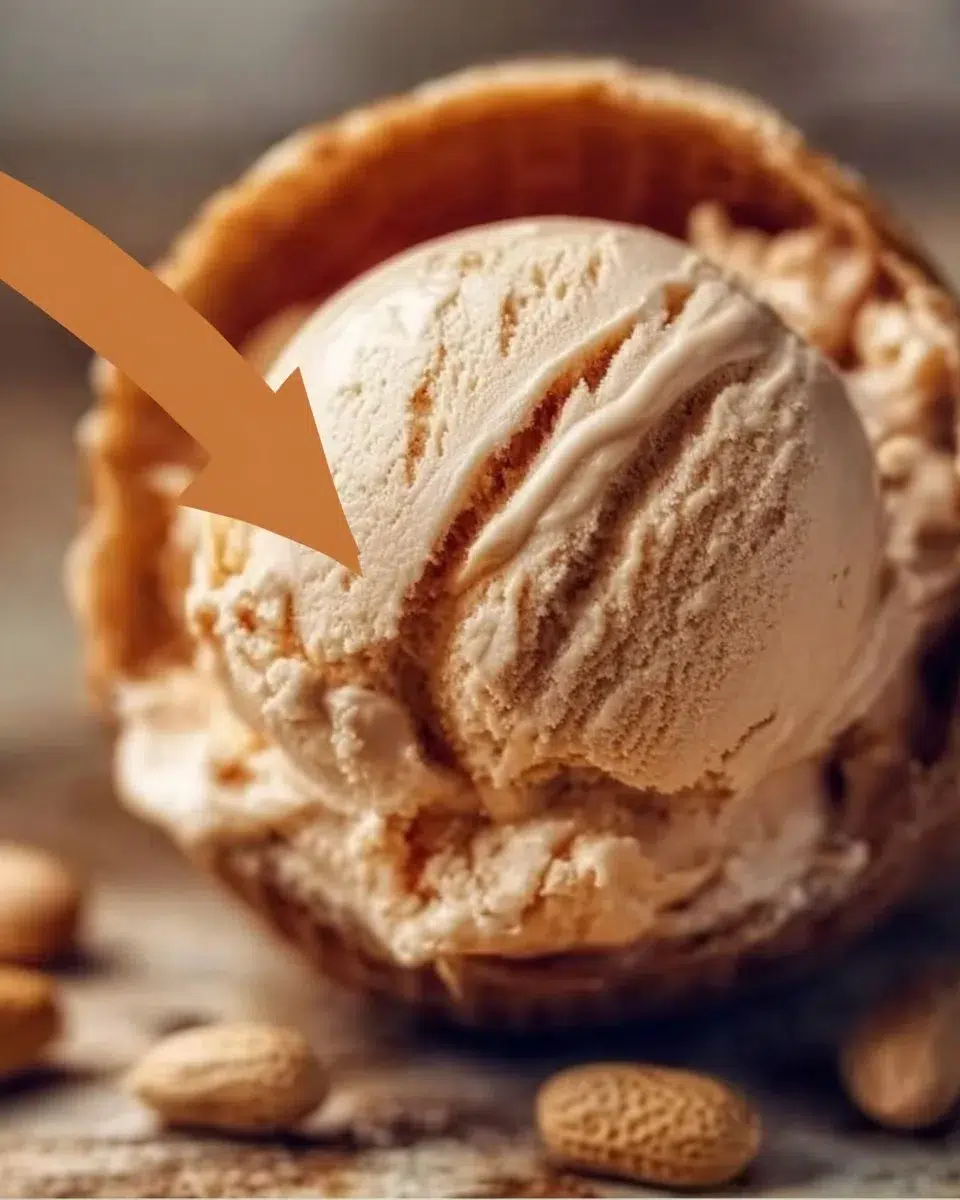
Hot, nutty peanut butter meets cool, creamy ice cream in a simple no-churn base. Peanut Butter High Protein Ice Cream gives you a scoop that tastes indulgent but packs more protein than typical store-bought pints. I perfected this version after testing it 10 times, tweaking protein amounts, and adjusting the mix-to-freeze ratio for the creamiest texture. The result is silky, scoopable ice cream you can make in under 20 minutes of hands-on time and then freeze. If you love classic peanut-butter desserts, try a similarly nostalgic treat like Amish peanut butter cream for a plated dessert that pairs well with a scoop.
This recipe focuses on balance: enough fat for richness, just enough sweetener, and added whey or plant protein for muscle-friendly fuel. Read on for ingredient science, exact measurements in metric and imperial, pro tips, and variations that keep texture and flavor intact. Then head to the step-by-step to make it tonight.
Why This Recipe Works
- High-fat elements (whipped cream and peanut butter) give the ice cream body and richness, preventing icy crystals from dominating the texture.
- Sweetened condensed milk acts as both sweetener and softener; its sugars lower the freezing point so the ice cream stays scoopable.
- Adding concentrated protein powder boosts protein without watering down the mix; using 2–3 scoops keeps the texture balanced.
- Folding technique preserves whipped cream volume and air pockets for a light mouthfeel—do not overfold.
- A short rest in the freezer (about 1 hour) before final freezing lets large air pockets settle and yields a smoother final texture.
Ingredients Breakdown
- Heavy whipping cream — 480 ml (2 cups). Provides richness and body. For best whipping, chill the bowl and whisk first.
- Sweetened condensed milk — 396 g (1 can). Acts as sweetener and softener. You can reduce to 300 g and add 2–3 tbsp maple syrup for a less-sweet finish, but texture will firm slightly.
- Creamy peanut butter — 240 g (1 cup). Gives peanut flavor and additional fat and protein. Natural peanut butter can separate—stir thoroughly; it may be slightly thinner.
- Plain full-fat Greek yogurt — 240 g (1 cup). Adds tang and contributes protein while lightening the base.
- Unflavored whey or plant protein powder — 60 g (about 2 scoops). Use whey isolate for neutral flavor and minimal texture change. Plant proteins can make the mix grainy; if using plant powder, choose a finely milled blend and add 1 tbsp neutral oil to round the mouthfeel.
- Pure vanilla extract — 5 ml (1 tsp). Balances flavors.
- Fine sea salt — 1/4 tsp. Enhances peanut flavor.
- Optional mix-ins: dark chocolate chips 80 g (1/2 cup) or fudge ripple made from 60 g (1/4 cup) melted chocolate and 1 tsp oil.
Substitution notes: You can substitute Greek yogurt for 1/2 cup (120 g) of the condensed milk to cut sugar, but the ice cream will be firmer and less sweet. If you use a low-fat cream, texture will be icier.
Essential Equipment
- 1.5–2 quart / 1.5–2 L loaf pan or freezer-safe container (shallow is better for faster freeze).
- Electric mixer or stand mixer with whisk attachment for whipping cream. Hand-whisking takes longer but works.
- Rubber spatula for gentle folding.
- Measuring cups, spoons, and a kitchen scale for accuracy.
- Chill bowl and whisk: place metal bowl and beaters in the fridge for 10 minutes before whipping if your kitchen is warm.
If you don’t have a mixer, whip the cream by hand in a chilled metal bowl for 6–8 minutes, or use an immersion blender briefly for the base.
Step-by-step Instructions
Prep Time 15 minutes. Cook Time 0 minutes. Inactive Time 8 hours (freeze). Total Time 8 hours 15 minutes. Servings 10 (about 1/2 cup / 120 ml per serving).
Step 1: Chill equipment and measure ingredients
Put the mixing bowl and whisk or beaters in the refrigerator for 10 minutes to chill. Measure 480 ml (2 cups) heavy cream, 396 g (1 can) condensed milk, 240 g (1 cup) peanut butter, 240 g (1 cup) Greek yogurt, and 60 g (2 scoops) protein powder so everything is ready. This saves time and prevents overwhipping.
Step 2: Whip the cream to soft peaks
Whip the chilled 480 ml (2 cups) heavy cream with an electric mixer on medium-high until soft peaks form, about 2–3 minutes. Stop when the cream holds a gentle peak and still looks glossy. Do not overwhip — it should not be grainy or start to separate.
Step 3: Make the peanut butter-protein base
In a separate bowl, whisk together 396 g (1 can) sweetened condensed milk, 240 g (1 cup) creamy peanut butter, 240 g (1 cup) Greek yogurt, 60 g (2 scoops) protein powder, 5 ml (1 tsp) vanilla, and 1/4 tsp salt until smooth, about 1–2 minutes. If the peanut butter is stiff, warm it briefly (10–15 seconds) in the microwave to loosen, then stir.
Step 4: Fold whipped cream into the peanut base
Fold one-third of the whipped cream into the peanut-protein base to lighten it, using a rubber spatula and gentle strokes. Fold in the remaining whipped cream until mostly uniform, about 6–8 gentle turns. Stop folding when streaks disappear — overmixing will deflate the cream and make the ice cream dense.
Step 5: Add optional swirl or mix-ins, then containerize
If using chocolate chips or a fudge ripple, fold them in now or spoon ribbons of melted chocolate into the top and swirl with a knife three times. Pour the mixture into a shallow 1.5–2 L freezer-safe pan and smooth the surface, about 1–2 minutes.
Step 6: Freeze and rest for best texture
Cover the pan tightly with plastic wrap (press wrap onto the surface to prevent ice crystals) and freeze until firm, 6–8 hours or overnight. For scoopable texture, let sit at room temperature 5–10 minutes before serving. Use scoop warmed by running under hot water for clean scoops.
Expert Tips & Pro Techniques
- Common mistake: overwhipping the cream. If the cream is grainy or separated, start over with fresh cream. Use chilled tools to reduce risk.
- Stabilize for smoother texture: dissolve 1 tsp of instant milk powder into the condensed milk to add body and reduce iciness. Professionals often use a small amount of stabilizer; instant milk powder is a home-friendly option.
- Prevent freezer burn: press plastic wrap directly onto the ice cream surface before sealing the lid. This minimizes ice crystals.
- Make-ahead: freeze in the pan up to 2 months. For parties, scoop into an airtight container and freeze solid; bring to the table after 8–10 minutes out of the freezer.
- Professional technique adapted for home: temper cold ingredients. Let Greek yogurt sit 5 minutes at room temp so it blends smoothly with peanut butter and protein powder; this prevents lumps.
- Texture rescue: if your final ice cream is too hard, stir in 1–2 tbsp of light corn syrup or 1 tbsp vodka per batch before freezing to keep it softer.
Storage & Reheating
- Refrigerator: Not recommended for storage—ice cream must stay frozen. If softened, return to freezer immediately.
- Freezer: Store in an airtight container for up to 2 months. For best flavor and texture, consume within 4 weeks.
- Thawing/Serving: Remove from freezer 5–10 minutes before serving for scoopable texture. If very hard, set the container in a bowl of warm water for 30–60 seconds, wipe dry, and scoop.
- Reheating: Do not microwave to reheat; it melts unevenly. Instead, let soften at room temperature as described.
Variations & Substitutions
- Vegan Version: Replace heavy cream with 600 ml chilled full-fat coconut cream, use 1 can of sweetened condensed coconut milk, and swap whey for 60 g (2 scoops) vegan pea/rice protein. Freeze time stays the same; expect a slight coconut flavor.
- Lower-Sugar Version: Use 240 g (1/2 can) sweetened condensed milk plus 3–4 tbsp maple syrup and 60–80 ml (1/4–1/3 cup) whole milk to adjust sweetness and texture. The mixture may freeze a touch firmer; soften before serving.
- High-Protein, Lower-Fat: Replace heavy cream with 360 ml (1.5 cups) 10% cream and increase Greek yogurt to 360 g (1.5 cups). Reduce peanut butter to 180 g (3/4 cup). Expect a lighter mouthfeel and slightly icier texture.
- Chunky PB Cup: Stir in 120 g (1/2 cup) chopped peanut butter cups or toasted peanuts at the end. Keep swirl time short to avoid melting.
- Chocolate Peanut Butter: Use 30 g (1/4 cup) high-quality cocoa powder whisked into the condensed milk base and reduce peanut butter to 180 g (3/4 cup). Add 60 g (1/3 cup) chocolate chips.
Serving Suggestions & Pairings
- Scoop over warm brownies or a brownie square for a classic warm-and-cold contrast. Pair with our chocolate-peanut butter baked bar.
- Garnish with crushed roasted peanuts and a drizzle of warmed peanut butter sauce for texture.
- Serve with espresso or an iced cold brew for an adult dessert pairing.
- Make a sundae with sliced banana and salted caramel; try alongside a chocolate peanut butter cookie from our cookie recipe.
- For a protein-forward shake, blend 1 scoop of ice cream with milk and a banana as a quick post-workout smoothie, inspired by this chocolate peanut butter smoothie idea.
Nutrition Information
Per serving: Serving size 1/2 cup (120 ml). Makes 10 servings.
- Calories: 484 kcal (estimate)
- Total Fat: 30 g
- Saturated Fat: 11 g
- Cholesterol: 80 mg
- Sodium: 150 mg
- Total Carbohydrates: 36 g
- Dietary Fiber: 3 g
- Sugars: 27 g
- Protein: 13 g
Nutrition values are estimates. Actual values may vary based on specific ingredients and preparation methods.
Frequently Asked Questions
Q: Why did my ice cream become icy instead of creamy?
A: Most often this happens from not folding enough air into the base or from large ice crystals forming during freezing. Press plastic wrap onto the surface before freezing and avoid over-diluting the base. Using a bit of condensed milk or 1 tbsp alcohol can help softness.
Q: Can I make this without eggs?
A: Yes — this recipe contains no eggs. The structure comes from whipped cream, peanut butter, and protein powder.
Q: Can I double this recipe?
A: Yes. Use a larger container and two pans if your freezer space is limited. Freeze time may increase slightly; plan on 8–10 hours.
Q: Can I prepare this the night before?
A: Absolutely. Make the base and freeze overnight for best texture. Remove it 5–10 minutes before serving.
Q: How long does this keep in the freezer?
A: Store in an airtight container up to 2 months. For best flavor and texture, eat within 4 weeks.
Q: What protein powder works best?
A: Unflavored whey isolate gives the most neutral flavor and smooth texture. If you prefer vegan protein, expect a slightly grainier texture; choose a finely milled blend.
Q: How can I soften the ice cream quickly?
A: Let the pint sit at room temperature for 5–10 minutes, or set the container in warm water for 30–60 seconds, then scoop.
Conclusion
If you want a dairy-free, magnum-style take, check out this creative vegan no-churn peanut butter protein bars recipe for inspiration on coating and shaping. For another tested no-churn method that leans into classic proportions, see this No Churn Peanut Butter Ice Cream recipe which offers useful technique notes you can adapt to this high-protein version.
Print
Peanut Butter High Protein Ice Cream — No-Churn Recipe
- Total Time: 495 minutes
- Yield: 10 servings 1x
- Diet: High Protein, Vegetarian
Description
This no-churn Peanut Butter High Protein Ice Cream combines creamy peanut butter with whipped cream for a rich, high-protein dessert that stays scoopable.
Ingredients
- 480 ml (2 cups) heavy whipping cream
- 396 g (1 can) sweetened condensed milk
- 240 g (1 cup) creamy peanut butter
- 240 g (1 cup) plain full-fat Greek yogurt
- 60 g (about 2 scoops) unflavored whey or plant protein powder
- 5 ml (1 tsp) pure vanilla extract
- 1/4 tsp fine sea salt
- Optional mix-ins: 80 g (1/2 cup) dark chocolate chips or fudge ripple
Instructions
- Chill the mixing bowl and whisk in the refrigerator for 10 minutes. Measure all ingredients to save time.
- Whip the chilled cream until soft peaks form, about 2–3 minutes. Be careful not to overwhip.
- In a separate bowl, mix the condensed milk, peanut butter, Greek yogurt, protein powder, vanilla, and salt until smooth.
- Gently fold in the whipped cream until mostly uniform, being careful not to deflate the mixture.
- If using, add chocolate chips or fudge ripple and stir gently. Transfer the mixture to a shallow freezer-safe container and smooth the surface.
- Cover tightly with plastic wrap and freeze until firm, about 6–8 hours or overnight. Let sit at room temperature for 5–10 minutes before serving if too hard.
Notes
For a dairy-free version, substitute heavy cream with chilled full-fat coconut cream and sweetened condensed milk with coconut alternatives.
- Prep Time: 15 minutes
- Cook Time: 0 minutes
- Category: Dessert
- Method: No-Churn
- Cuisine: American
Nutrition
- Serving Size: 1/2 cup (120 ml)
- Calories: 484
- Sugar: 27g
- Sodium: 150mg
- Fat: 30g
- Saturated Fat: 11g
- Unsaturated Fat: 0g
- Trans Fat: 0g
- Carbohydrates: 36g
- Fiber: 3g
- Protein: 13g
- Cholesterol: 80mg

Written by Anna
Anna is a professional recipe developer and food writer at Al3abFun. With over 8 years of experience in recipe development and food styling, she specializes in creating approachable, tested recipes that bring families together around the dinner table. Anna holds a culinary arts certification and has been featured in various food publications. Every recipe on Al3abFun is triple-tested in her home kitchen to ensure perfect results every time.