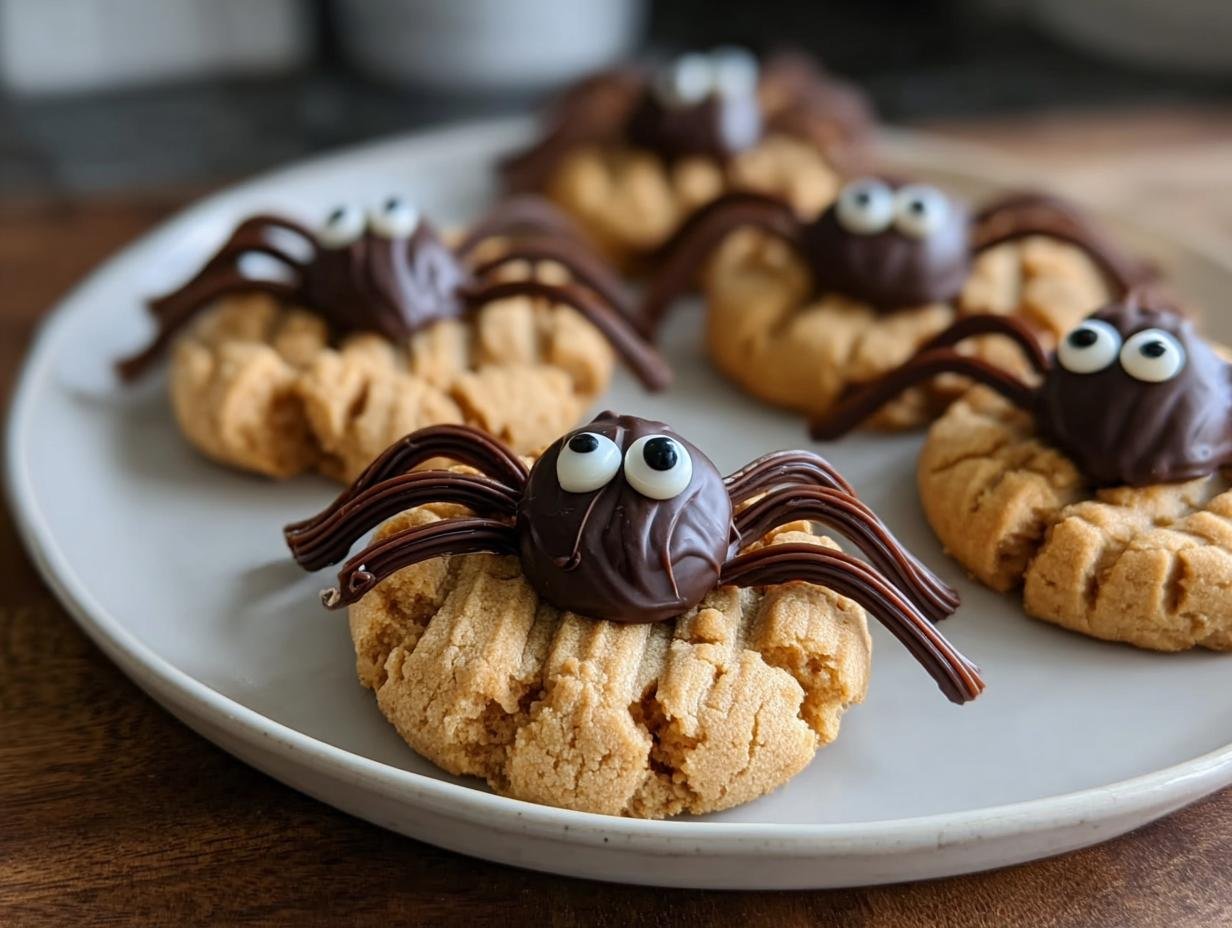
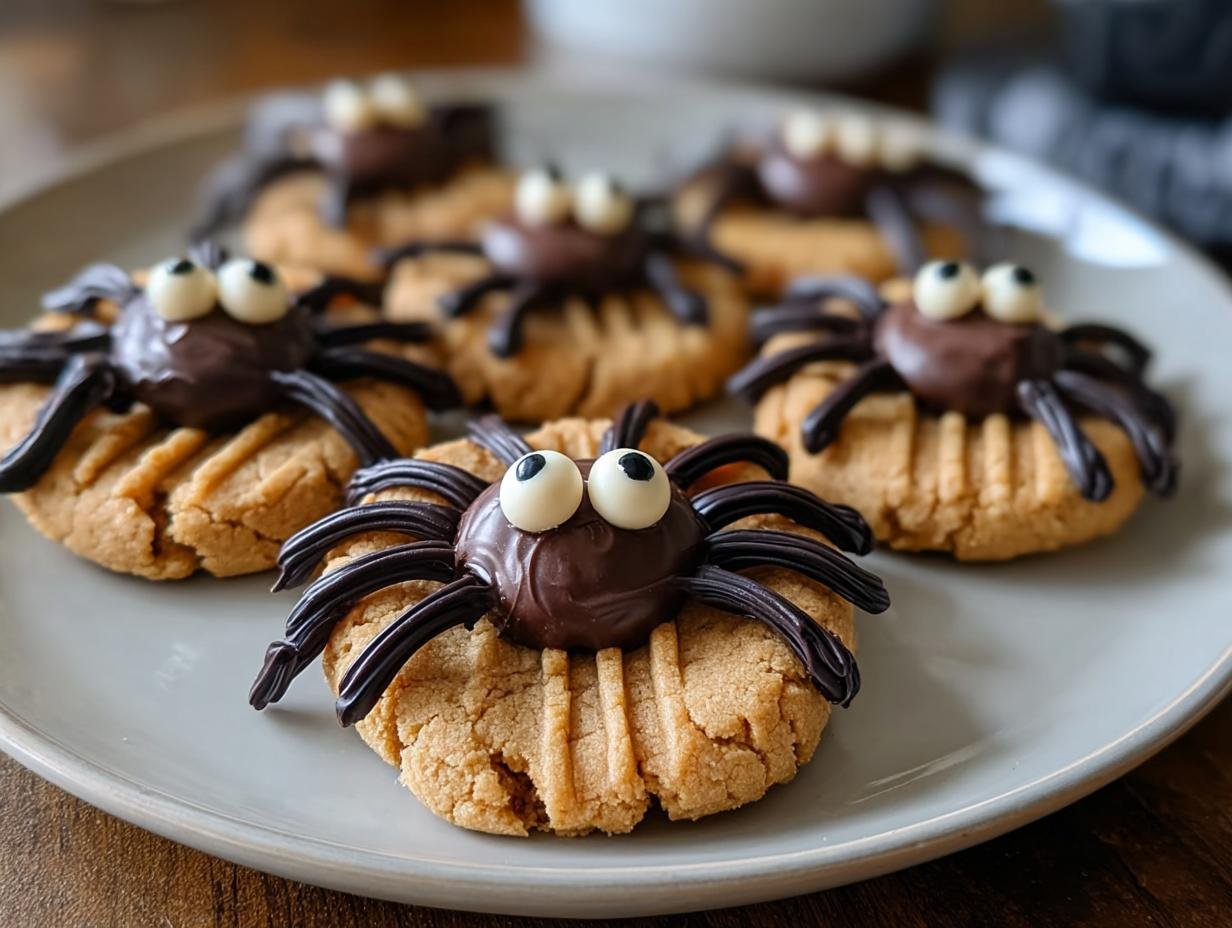
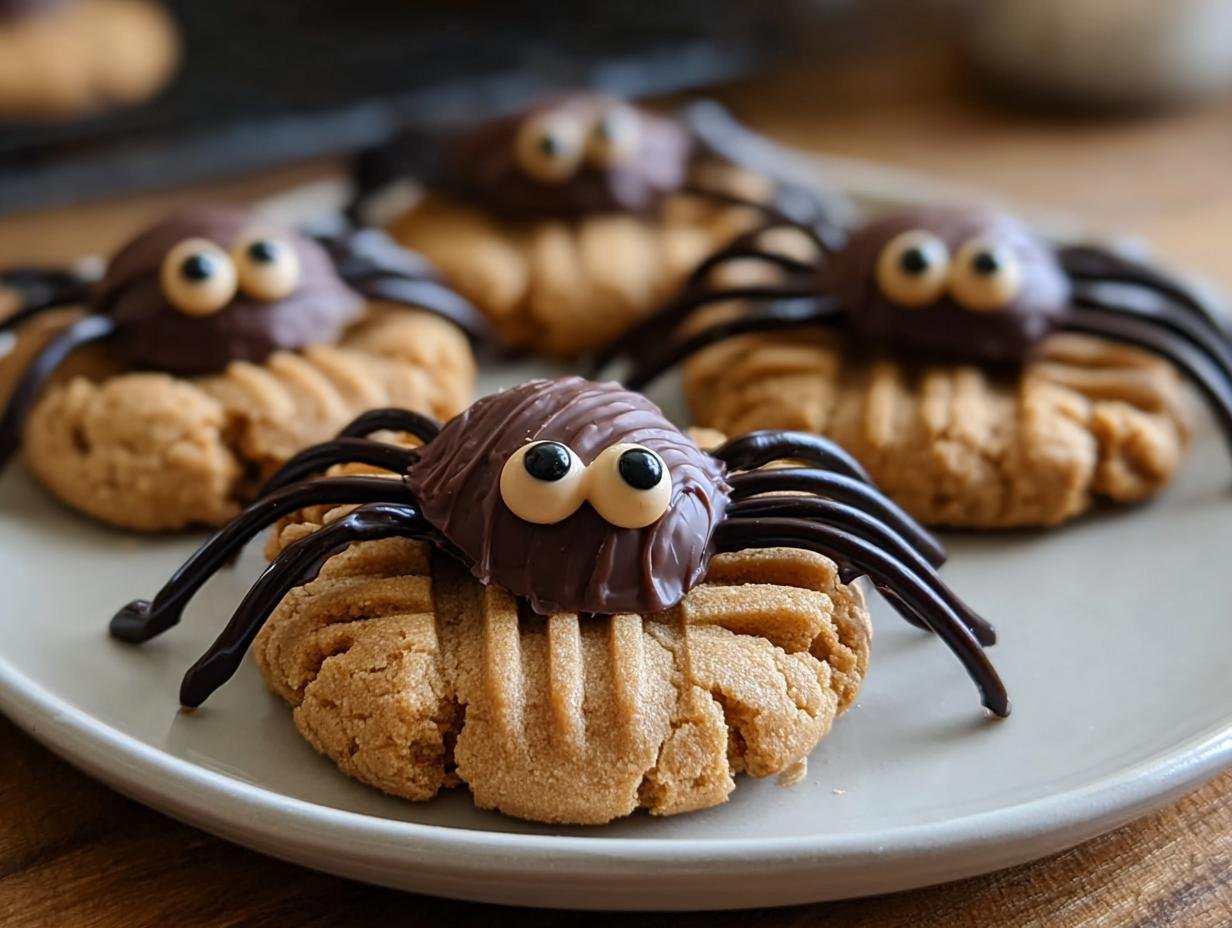
Spider cookies have always been my absolute favorite part of Halloween baking, and this year I’ve perfected an incredibly easy spider cookies recipe that’s just bursting with flavor and spooky charm! I remember my mom making these when I was little, and the combination of sweet peanut butter cookies topped with rich chocolate and those perfectly placed candy eyes always felt so magical. The aroma of baking peanut butter and melting chocolate filling the kitchen truly signals the start of the spooky season for me. Let’s get baking these spooky delights!
Why You’ll Love These Spider Cookies
- The irresistible combination of peanut butter and chocolate makes these a flavor explosion.
- With a prep time of only 20 minutes, they’re perfect for busy weeknights.
- These Halloween spider cookies are surprisingly budget-friendly, using common pantry staples.
- They’re a fantastic family-friendly activity, and kids adore helping to decorate.
- The visual appeal of these chocolate spider cookies, complete with candy eyes, is unmatched for parties.
- You’ll be amazed at how simple it is to create these fun Halloween treats.
- The peanut butter base is wonderfully tender, making them a delight to bite into.
- They’re a festive and delicious way to get into the spooky spirit!
Ingredients for Spider Cookies
Gathering these ingredients is the first step to creating these spooktacular treats. You’ll need:
- ½ cup shortening – this helps create a tender cookie base
- ½ cup peanut butter – for that classic, delicious flavor
- ½ cup packed brown sugar – adds moisture and a caramel note
- ½ cup white sugar – for sweetness and a nice texture
- 1 large egg, beaten – acts as a binder
- 2 tablespoons milk – helps with dough consistency
- 1 teaspoon vanilla extract – enhances the overall flavor
- 1 ¾ cups all-purpose flour – the structure of our cookies
- 1 teaspoon baking soda – for leavening and lift
- ½ teaspoon salt – balances the sweetness
- ¼ cup white sugar for rolling – gives a lovely crunchy coating
- 24 chocolate candy spheres (such as Lindt Lindor Truffles), chilled – these will be the spider bodies; chilling helps with clean cuts
- 48 candy eyeballs – essential for our creepy crawly friends!
- ½ cup prepared chocolate frosting – used for attaching eyes and piping legs, though you could also use crushed pretzel sticks for spider cookies with pretzel legs.
How to Make Spider Cookies
- Step 1: Preheat your oven to 375°F (190°C). Line your baking sheets with parchment paper. This ensures the cookies don’t stick and makes for easy cleanup, which is always a win when making simple spider cookies.
- Step 2: In a large bowl, cream together the shortening, peanut butter, brown sugar, and white sugar until the mixture is smooth and creamy. This is where that lovely peanut butter aroma starts to fill your kitchen!
- Step 3: Beat in the egg, milk, and vanilla extract until everything is well combined.
- Step 4: Gradually stir in the all-purpose flour, baking soda, and salt until a soft dough forms. Be careful not to overmix; we want tender cookies, not tough ones.
- Step 5: Place the ¼ cup of white sugar for rolling into a small shallow bowl. Roll each cookie dough ball (about 1 ½ inches in diameter) into the sugar until coated.
- Step 6: Place the sugar-coated dough balls about 2 inches apart on the prepared baking sheets.
- Step 7: Bake for 10–12 minutes, or until the edges are lightly golden. While the cookies are still warm, gently press a dimple into the center of each one. These dimples will be perfect for our spider bodies. Allow them to cool completely on the baking sheets before moving them.

- Step 8: Once the cookies have cooled, carefully cut the chilled chocolate candy spheres in half. Place one half into the dimple of each cookie.
- Step 9: Now for the fun decorating part! Use the prepared chocolate frosting to attach two candy eyeballs to each chocolate half. Then, pipe spider legs onto the cookies around the chocolate bodies, creating a wonderful spiderweb sugar cookies effect. Let the frosting set for about 30 minutes before serving these amazing spider cookies.
Pro Tips for the Best Spider Cookies
Want to make your spider cookies truly spectacular? Follow these insider tips for a perfect bake and spooktacular decoration every time.
- Chill your chocolate truffle halves before attaching them to the cookies. This makes them easier to cut cleanly and keeps them from melting onto the warm cookie.
- Use a small piping bag with a fine tip for the chocolate frosting legs. This gives you the most control for creating delicate, realistic spider legs.
- Don’t overbake the cookies! They should be lightly golden at the edges. They will continue to firm up as they cool, and overbaking can lead to dry cookies.
- For an extra festive touch, you can sprinkle a little edible glitter on the chocolate bodies before adding the eyes.
What’s the secret to perfect spider cookies?
The secret is in the gentle creaming of the peanut butter dough and not overmixing. For decorating, using chilled chocolate halves and a fine piping tip for the legs ensures those spooky spider cookies look truly authentic and creepy.
Can I make spider cookies ahead of time?
Yes, you can definitely prepare the cookie dough balls and bake the cookies a day in advance. Store them in an airtight container at room temperature. Wait to decorate them with the chocolate bodies, frosting, and candy eyes until just before serving for the freshest look.
How do I avoid common mistakes with spider cookies?
A common pitfall is dough consistency; if it’s too sticky, chill it for 15 minutes. Another mistake is decorating while cookies are warm, which melts the chocolate. Always let your cookies cool completely before adding the spider bodies and legs for the best results.

Best Ways to Serve Spider Cookies
These fun Halloween spider cookies are a showstopper on any dessert table! For Halloween parties, I love arranging them on a tiered stand with other spooky treats like ghost cupcakes or pumpkin brownies. They pair wonderfully with a cold glass of milk or a warm mug of apple cider, making them a hit with both adults and kids. If you’re looking for specific ideas for serving spider cookies for kids, consider creating a “spider’s lair” with dark chocolate bark and gummy worms as a fun dessert board. They also make a fantastic addition to a Halloween cookie exchange!
Nutrition Facts for Spider Cookies
Here’s a breakdown of the nutritional information for each delicious spider cookie:
- Calories: 140
- Fat: 8g
- Saturated Fat: 3g
- Protein: 2g
- Carbohydrates: 16g
- Fiber: 1g
- Sugar: 12g
- Sodium: 95mg
Nutritional values are estimates and may vary slightly based on the specific ingredients and brands you use. For more insights into dietary components, you might find information on fiber intake helpful.
How to Store and Reheat Spider Cookies
Once your spooky spider cookies have cooled completely and the frosting has set, proper storage is key to keeping them looking and tasting their best. For short-term enjoyment, place them in an airtight container, layering with parchment paper between rows to prevent sticking. They’ll stay fresh for about 3 to 4 days when stored at room temperature. If you need to keep these fun Halloween spider cookies longer, they freeze beautifully! Wrap individual cookies tightly in plastic wrap, then place them in a freezer-safe bag or container for up to 3 months. To reheat after freezing, simply let them thaw overnight in the refrigerator, then bring them to room temperature for about 30 minutes before serving. While these are baked cookies, if you were making a no-bake version, you’d follow similar container rules, but refrigeration would be essential to maintain their structure. Consider exploring unique ingredient pairings for future baking adventures.
Frequently Asked Questions About Spider Cookies
What’s the best cookie base for spider cookies?
While this recipe uses a delicious peanut butter cookie base, which is a fantastic starting point for our spooky spider cookies, you can adapt many cookie types. A sturdy sugar cookie dough, like one you’d use for spiderweb sugar cookies, also works wonderfully. The key is a cookie that bakes up firm enough to support the chocolate body and candy eyes without collapsing.
How do I make the spider legs look realistic?
To achieve realistic spider legs, a fine-tipped piping bag filled with melted chocolate or chocolate frosting is your best friend. Practice drawing thin, slightly curved lines radiating from the chocolate body. For a more defined look on your decorated spider cookies, try using black piping icing. This technique helps create those creepy crawly spider cookies that kids adore.
Can I make these spider cookies gluten-free?
Absolutely! To adapt this into a gluten-free spider cookies recipe, you can easily substitute a good quality gluten-free all-purpose flour blend for the regular flour. Make sure the blend contains xanthan gum, or add about ½ teaspoon yourself. The texture might be slightly different, but the spooky fun remains the same!
My chocolate bodies are sliding off. What’s the best spider cookies recipe tip?
If your chocolate truffle halves are sliding, it usually means the cookies aren’t quite cool enough, or the chocolate is too warm. Let your cookies cool completely before attaching the chocolate bodies. For the best spider cookies, ensure the chocolate truffle pieces are chilled until just before you need them. A tiny dab of extra frosting can also act as “glue” to secure them firmly.
Variations of Spider Cookies You Can Try
While this peanut butter version is a personal favorite, there are so many fun ways to customize these treats! Get creative and make these your own with these exciting variations. These ideas help turn a simple bake into truly memorable fun Halloween spider cookies.
- Gluten-Free Spiders: Easily adapt this recipe by swapping the all-purpose flour for a 1:1 gluten-free baking blend. Ensure your blend includes xanthan gum for the best texture. Your spooky spider cookies will be just as delicious!
- No-Bake Spider Cookies: For a quicker treat, skip the oven! Mix the peanut butter dough ingredients, shape into balls, and chill them. Then, press the chocolate bodies and candy eyes directly onto the chilled dough. These spider cookies no-bake are perfect for little helpers.
- Chocolate Lover’s Spiders: Enhance the chocolate flavor by using a chocolate cookie base instead of peanut butter. You can also dip the entire cookie in melted chocolate before adding the spider body and eyes for an extra decadent treat.
- Spiced Up Spiders: Add a pinch of cinnamon or a dash of pumpkin pie spice to the cookie dough for a warm, autumnal twist on these creepy crawly spider cookies.

Perfect Spider Cookies: 1 frightful bite
- Total Time: 40 minutes
- Yield: 48 cookies 1x
- Diet: Vegetarian
Description
Spooky peanut butter spider cookies topped with chocolate truffles and candy eyes, perfect for Halloween parties and fun baking with kids.
Ingredients
- ½ cup shortening
- ½ cup peanut butter
- ½ cup packed brown sugar
- ½ cup white sugar
- 1 large egg, beaten
- 2 tablespoons milk
- 1 teaspoon vanilla extract
- 1 ¾ cups all-purpose flour
- 1 teaspoon baking soda
- ½ teaspoon salt
- ¼ cup white sugar for rolling
- 24 chocolate candy spheres (such as Lindt Lindor Truffles), chilled
- 48 candy eyeballs
- ½ cup prepared chocolate frosting
Instructions
- Preheat oven to 375°F (190°C) and line baking sheets with parchment.
- Beat shortening, peanut butter, brown sugar, and white sugar until smooth. Add egg, milk, and vanilla.
- Stir in flour, baking soda, and salt until dough forms.
- Shape dough into 48 balls, roll in sugar, and place 2 inches apart on sheets.
- Bake 10–12 minutes until golden. Press a dimple in each cookie while warm. Cool completely.
- Cut truffles in half and place one piece on each cookie.
- Use frosting to attach candy eyes and pipe spider legs. Let set for 30 minutes.
Notes
- Keep chocolate truffles chilled until ready to use for cleaner cuts.
- Decorate only after cookies have cooled fully to avoid melting.
- Prep Time: 20 minutes
- Cook Time: 12 minutes
- Category: Dessert
- Method: Baking
- Cuisine: American
Nutrition
- Serving Size: 1 cookie
- Calories: 140
- Sugar: 12g
- Sodium: 95mg
- Fat: 8g
- Saturated Fat: 3g
- Unsaturated Fat: 4g
- Trans Fat: 0g
- Carbohydrates: 16g
- Fiber: 1g
- Protein: 2g
- Cholesterol: 10mg

